Monday, February 25, 2013

Low Toxin, more eco-friendly hair color


Obviously, I dye my hair. No one is born with pink hair.

You might be thinking: what about the chemicals in hair dye? Is there a toxin free way to bleach and dye hair? The answer is: there is no chemical free way to bleach or dye your hair but there are ways to reduce your exposure to specific toxins and hair color systems that are more eco-friendly.

Henna - An ancient form of hair coloring based on the henna plant, henna is moisturizing and provides some pigment upon one application. You can re-apply over and over to build the shade up. Henna can lighten a few shades, but not much. Pure henna is almost always some form of red. I have found henna-based dyes in bright colors like pink, blue, and purple but I've also read that since the henna plant leaves obviously do not grow in those colors, those products are really mostly chemical dyes like any other chemical dye. The metallic components added to henna to produce these unusual colors can also react with traditional hair dyes, so be very careful mixing henna with other forms of dyeing or bleaching.

Highlighting - In general, highlighting with any type of product exposes your body to less direct contact with the dye because it doesn't sit on your scalp like all-over haircolor would -- it is typically applied with foils. At least, it doesn't cover all of your scalp when it does touch at the roots. Be aware of what bleaching agents are used in highlighting formula you use. My stylist did some research on ammonia in bleaching and found that some of the low-fume ammonia dyes contained just as much ammonia (or more) than the stronger-smelling ammonias, they were just more difficult to detect by smell. He prefers to use a low-ammonia version of bleaching rather than conventional ammonia disguised with extra chemicals to hide the smell.

Botanical and lower-toxin brands of professional color - The two main brands I found are Aveda and Pravana. Both are professional salon color systems and have a large spectrum of colors, traditional (browns, blondes, gingers) and alternative (pink, purple, blue, green, etc.). While these brands do utilize chemicals that are found in traditional color systems, they make a point to avoid phthalates, formaldehyde, and parabens. Both brands specifically avoid the use of petrochemicals or animal ingredients and do not do animal testing. Most of their product packaging is recycled and/or biodegradable.

What I have on my hair in the pictures you'll find on Instagram and Twitter is the Pravana VIVIDS for the pink, and their low-ammonia bleaching system for the base blonde. Did I have to bleach the crap out of my scalp for that light blonde? Yes, yes I did. Is that probably great for my hair? Probably not. At my last appointment, my stylist did a deep conditioning treatment and I do a weekly coconut oil treatment. I'll have to post more on that later. Overall, I am happy with my choice and plan to keep it up for as long as possible. I expect that 6 months is probably the longest I can do this before my hair becomes damaged.

Do you dye your hair? If so, have you tried lower-toxin alternatives or henna? What have been your results?


NOTE: I was not compensated in any way for the mention of these product lines, information is based on my own research and I pay for my pink hair out of my own pocket!

Sunday, February 24, 2013

Sponsors and new ad spaces open!

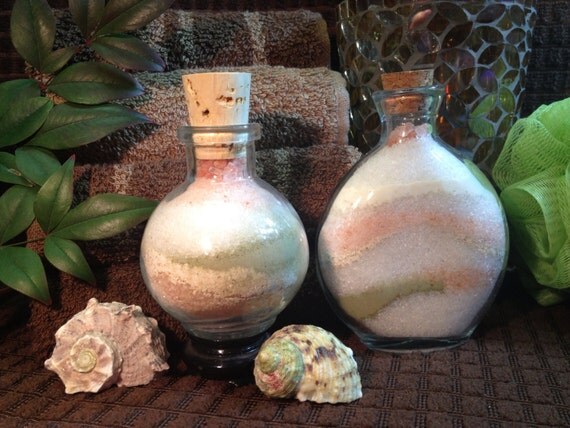
It's the weekend, which means it's time to do some blog business. If you haven't visited my #1 sponsor, Healthy Feet, Happy Body on Etsy for some locally made (but nationally shipped!) aromatherapy bath and body products made with high quality essential oils, please visit today! She has just added Himalayan Bath Salts in refillable bottles for as low as $4.

These therapeutic bath salts help tremendously with aches and pains, as well as soreness from working out. If you take classes at my studio, you need these! They make great gifts for that Cross Fit addict in your life as well.

As for the blog, I'm in the (slow) process of moving from the Blogger platform to Wordpress. If you aren't a blogger, this probably means nothing, but in the end it should provide a better usability experience for you, the reader. It will also mean some new design, which I'm excited about.

With this design will come new opportunities for advertising! Right now you can see in the right column where I have several large square spots. These are particularly eye-catching in their size and right in line with the middle of a typical post. If you have a business of any kind, or would like to advertise your own blog in that area, I have monthly rates for the Large Right Column in my ad shop right now!

If you are considering purchasing multiple months, I can give you a discount beyond the stated rates, please feel free to contact me directly.

Thanks for putting up with my housekeeping, and hope you've had a great weekend!

Thursday, February 21, 2013

On conventional and natural ear fluid treatment


A few months ago, I began to suspect that my 3 year old son, Little Sir, might have some hearing issues. It wasn't his language development, that was on target or ahead, but he just seemed to be missing a lot of things I said to him in a normal tone.

Another odd coincidence: every time since he was 1 year old when he'd had the standard hearing-machine tests at the pediatrician, the machine "hadn't been able to get a reading" due to "fluid in the ears". Never an infection -- he hasn't had an ear infection since he was 16 months old -- but always "some fluid in the way".

Our pediatrician referred us to a pediatric Ear, Nose, and Throat (ENT) specialist that practiced at a private hospital. Pricey, for someone as under-insured as we are. At this ENT, they did auditory testing with a machine and by playing sounds for him in headphones and allowing him to respond by throwing blocks into a bucket. He thought that was a pretty fun game! The results of these tests: significant hearing loss. He actually could not hear anything at a conversation level. They bypassed the ear drum and testing the capacity of the actual sound conducting parts of his head (?) and he does have the capacity to hear, the fluid was just keeping the ear drums from vibrating at all. This ENT suggested both ear tubes and removal of adenoid fluid. When we got the estimated cost of surgery from this private pediatric facility, we nearly had a heart attack.

We decided to get a second opinion, and while we were waiting for the second appointment, try holistic and chiropractic methods to help reduce the fluid in his ears. Some things we did to help alleviate the fluid between appointments:


  1. pediatric chiropractic adjustment of the spine (twice)
  2. specific adjustment of the ears themselves, both by the doctor and then she showed us how to do it at home
  3. essential oil blend (thyme, lavender, melaleuca) targeted to prevent ear infections, applied behind the ear
Despite these treatments, when we went to the second ENT appointment and all the auditory and throwing-blocks tests were re-done, he came back with the exact same hearing loss and the exact same recommended treatment: ear tubes and possible removal of adenoid tissue.

At the first diagnosis, I was not enthusiastic about putting Little Sir under anesthesia. All the work we do to reduce our childrens' exposure to toxins, and we were just going to fill him up with crazy sedatives! Still, after inquiring among the "green" blogger community, I could find no alternative treatments that we had not already tried. In fact, I found several "green" bloggers who attested to having tubes in their own ears as children (I did, too) and having tubes put in their childrens' ears with great improvement.

In the end, we went with the conventional treatment. We are OK with taking some unconventional or alternative routes but, in the end, his hearing is not something we were willing to risk. He had the surgery this Tuesday and is doing great. He says that he can hear much better. 

Has anyone else faced this decision with their children? Did you go with conventional or alternative treatment?

Monday, February 18, 2013

My green smoothie recipe (sort of)

I posted this photo yesterday of a green smoothie I created that contained 5 fruits and veggies (peaches, blueberries, kale, avocado, and bananas) plus probiotics, because I used my homemade kombucha in it:


I've been doing green smoothies a lot recently to increase my antioxidant intake during cold and flu season. If I start to feel a little worn out, I try a green smoothie and quick nap during the kids' nap rather than caffeine.

I'd like to post a single green smoothie recipe but honestly, my recipe changes every time based on what I have in my refrigerator and freezer. What I'll do instead is post a list of things that are in almost every smoothie and the ingredients that vary, to give a kind of formula for green smoothies that can be altered to fit your needs.

Every smoothie:

2 cups dark, leafy greens - Usually kale, but sometimes swiss chard, spinach, or even arugula.
Yogurt - Now that my son is dairy-free, I use cultured coconut milk yogurt. Leave out the yogurt if you are using kombucha for the liquid, those don't play well together!
1/2 cup frozen bananas - I buy "day old" bananas in a bag at the grocery store, slice them up, and keep them in the freezer so I can just grab a few. Because they are frozen, they work well in lieu of ice cubes, which helps the smoothie be creamier rather than watery. I wouldn't go much above 3/4 cup of bananas because using too many can make the smoothie too thick.
1/2 - 1 cup Frozen organic berries - Berries have great antioxidants, but since they aren't available year-round, I stock up during the summer months and freeze them. Blueberries freeze the best and are most cost effective for our area.
1 cup+ unsweetened fruit juice - Since I don't use ice cubes, I have to add a liquid. Most of the time, I use apple juice because it is the most cost effective. As I've mentioned, I have used kombucha in lieu of juice but you definitely have to add honey and/or peanut butter to balance out the tart-ness of kombucha.
Food grade lemon essential oil - The original recipe I started using for my green smoothies used lemon juice, but sometimes I don't have lemon juice. I always have lemon essential oil, and it's a lot more concentrated. I usually use 2-3 drops. Again, have to leave this out if you use kombucha because that would make the smoothie way too acidic/tart.

Optional/varying ingredients:

1 scoop flax powder - for protein
honey - when I'm using a more tart green, like arugula, or when I use kombucha instead of juice, it needs sweetening
peanut butter - if I end up with too many watery or tart ingredients, I'll need peanut butter to balance out the acidity
fresh fruit - most of the time I eat fresh fruit plain!
veggies - I particularly like to add celery to a kale and apple smoothie
different juices - I've used carrot juice, kombucha, cranberry juice, orange juice...
raw ginger - or other herbs/spices, but this is the main one that I use to settle my stomach
soaked cashews - I blame Stephanie for the fact that I frequently have this raw vegan staple on hand!

Here's an example of a typical smoothie without kombucha:

1/2 cup bananas
1/2 cup yogurt (or cultured coconut milk)
2 cups kale
1 scoop flax powder
1/2 cup frozen blueberries
1 cup apple juice
3 drops lemon essential oil
1 scoop flax powder
2 tbsp honey

I have a pretty good Black & Decker blender, so I just throw everything in and blend it all at once. I usually have to blend for around 2 minutes total.

Kids love to participate in making smoothies! I unplug the blender and let my toddlers throw the ingredients into the blender container. Then we sit down with our cups and drink the smoothies. If I have leftover, I pour it into silicon popsicle molds for special "treats" later.

What are your favorite green smoothie ingredients? Anything I'm missing?

Monday, February 11, 2013

How I make kombucha

Have you heard of kombucha? It's a fermented drink made from tea and a live organism called a scoby, which is a bacteria or fungus. It sounds gross, and I'm not going to lie, it looks kinda gross too...but it tastes good! And the resulting tea is full of good bacteria (probiotics) that can help balance your stomach and strengthen your immune system.

My husband thinks I am a little crazy because this is what the scoby looks like the jar:


So while it is brewing I make sure the cloth I cover it with is long enough to hang over the edge and cover the organism.


How do I make kombucha?

1. Get a scoby and at least 1/2 a cup of the kombucha it created from someone. If you are interested in making your own and live in the Dallas area, let me know -- my scoby makes a baby each time I brew, so I should almost always have one available.

2. Brew black or green tea with at least 1/2 cup of sugar per 1/2 gallon. I have seen people say use only white, processed sugar, but I didn't know about that until after I brewed my 2nd batch and I used organic raw sugar both times. I think the white sugar keeps the possibility of contamination lower so I will use that going forward.

3. Put the tea into a glass jar and it sit out overnight to reach room temperature.

4. Wash your hands with apple cider vinegar. If you wash using traditional soap, even soap made with essential oils, the germ-killing properties of the soap can also kill the scoby!

5. Gently place the scoby into the jar and cover with a cloth or towel secured with a rubber band. You want it to get plenty of air but keep bugs out.

6. Put the jar in a warm (70 degrees or above) place out of direct sunlight. A friend of mine keeps hers in the pantry, but I have no room in my pantry and my cupboards are all colder than the rest of the house, so I keep mine on the counter because it is not in the sunlight.

7. Allow the kombucha to ferment until it reaches your desired strength or taste. It is ready when it has formed a baby scoby on top of the jar, but you can let it sit longer if you'd like.

When you are ready to drink it, you can refrigerate the kombucha if you want or drink it room temperature. I have noticed that it gets bitter fast when refrigerated, and I don't like the way it tastes, but some people do.

Things that can go wrong.
I killed my first scoby, I think because I forgot to add the sugar and tried to add it later. Either bacteria from the spoon I stirred it with or the stirring motion itself must have killed the scoby. You can tell that you have failed if your jar grows any kind of mold. Mold is NOT what you want. You will have to throw everything out and start over with clean jars and new tea. The good news is, you can compost the scoby.

I recently read an article on WebMD that claimed homemade kombucha is rather dangerous. I had actually not heard anything about this before and, as you might have noticed from my Instagram and Twitter, I have allowed my children to drink it. I do dilute what they get with water (because fermentation can create alcohol in the beverage, the equivalent to what you'd get with any fermenting fruit), so they get a very small amount. But they looooove it and ask for it. Little Lady goes so far as to try and take the jar down from the counter sometimes.

Basically, kombucha is one of those weird things that crunchy people do because it might be healthy or not. I don't know how long I'll keep it up, but it's nice for now. For more info on kombucha, my fellow Green Sister Tiffany Washko posted on NatureMoms about making kombucha also.

What do you think about kombucha? Yes or no?

Saturday, February 09, 2013

A relaxing day with cheese

Since going dairy-free with my son almost 4 months ago, there is one thing that I miss a lot: CHEESE.
There was a time in my life when I could not imagine living without cheese. I used to buy fancy cheese and just eat it with crackers, all day long. Oh, glorious cheese.

So when some of us Dallas Moms Blog contributors were invited by Cabot to sample some cheese recipes and relax with a little yoga at Central Market, I said YES, PLEASE!

Check out the amazing food they served us:

#CabotRnR Blogger Event

#CabotRnR Blogger Event

Since we met in the Central Market Cooking School space, we each got to make our own cheese-inspired snacks. My favorite was these little strawberry bunnies sitting on top of cheese. My kids loved them!

How to make cheese mice #CabotRnR

#CabotRnR Blogger Event

Then we took a little time for yoga...

#CabotRnR Blogger Event


Thanks to Valerie of Charmed Valerie for taking the pictures of me and Cassidy Phan, fellow Dallas Moms Blog contributor, doing our yoga moves!

We were also given some Cabot cheeses to take home as well as a cutting board and two mini cheese cleavers. And flowers from Central Market!

It was a great time of mingling and relaxing, reminding us all that being healthy doesn't have to be a huge effort. In the spirit of simplicity and health, I'm including a simple recipe from Cabot for a "Munch Bowl", which is actually a great snack to put in a reusable snack bag and take with you for a quick lift any time of the day:
Munch Bowl

Ingredients:
1/3 cup red or green grapes
1/2 ounce Cabot Mild Lactose-Free Cheddar or Monterey Jack, cubed*
Heaping tablespoon roasted almonds

Directions:
Combine in small bowl or take "to go" in a reusable snack bag.

~~~~

For more pictures of the event, check out Regan Jones' Google+ album of the Dallas #CabotRNR Event!

Tuesday, February 05, 2013

Indoor play at Kidville: a giveaway!

Here in the Dallas area, we're starting to see warmer weather already, but do you know what that means? Rain! Where are you planning on taking your kids to get their energy out when it's too wet to play outside? I recently wrote a post with 7 Days of Indoor Play in Dallas and my #1 suggestion is Kidville, with their Play Village and Big Muscles Gym (which I've written about before). When you purchase a semester of classes at Kidville, you are a member with access to both play spaces. If you're not a member, you might be looking for an opportunity to try out the play spaces before you commit. Now is your chance!

Kidville is turning 2 years old this Thursday, February 7!

To celebrate, they are giving one of my lucky readers a package of 5 playspace passes!
That's 5 great days of play for your kids on rainy days, and a chance to check out Kidville for free.

Kidville Play Village

Just enter using the Rafflecopter form below. You must live in the Dallas area and be over 18 years of age to enter the giveaway. Extra entries by also entering this giveaway on The T-Shirt Mama's blog!

But what if you don't win? Don't cry!

On their birthday, Thursday, February 7, Kidville will be holding an open house event from 9:00am-5:00pm. They will be raffling off several items for people that come in that day, so you can still be a winner!

Spring Break is just around the corner and Kidville is offering 2 different Spring Break Camps this year.
  • Superhero – Fairy Princess Camp (ages 3,4,5) from 9:00am – 12:00am

  • Sizzlin’ Science Camp (ages 4,5,6) from 1:00pm – 4:00pm

Summer camps are always popular at Kidville! Camps are available or children 18 months – 6 years in 2, 8, 12, or 16 week sessions.

This giveaway has ended, thanks for participating!
a Rafflecopter giveaway

Monday, February 04, 2013

Essential oils and cold/flu symptoms

Thieves 15ml. + Thieves Hard Lozenges + Inner Defense ~ U.S.

I was offline for a while this weekend with the suspicion that I might have contracted the flu, since this year is supposedly an epidemic and I forgot to get my flu shot. I was just sure that someone in our family was going to get sick since I just published this post about Natural Cold and Flu Prevention and Treatment on Dallas Moms Blog. The minute I tell the whole internets that neither of my children has had anything more severe than a cough this season, I am just sure we'll be waiting in a doctor's office for some Tamiflu within the week.

Friday morning I did a more hardcore workout than usual -- the heat wasn't working in our studio, so I constructed a routine that would keep us warmed up and sweating throughout. Friday night I started to feel "off". Quick side note: the more often you work out, the faster you can tell when your body is off balance because you know you usually feel during and after workouts, and you can tell when you feel differently. That afternoon I had a green smoothie and took a nap. I immediately had my husband help me with Anna from Green Talk's hydrogen peroxide treatment! I went to bed with Thyme oil on my feet as well. Thyme is very effective in causing your body to sweat and purge out anything that might be starting to take hold.

I actually felt pretty good Saturday morning but quickly started to ache all over and I felt exhausted. I started to panic that I had the flu, but there was no fever. I took a warm shower and rubbed my neck and back muscles with lavender and peppermint oil, putting Thieves oil on my feet. I had another green smoothie and napped again (shout out to my husband who played with the kids while I treated my symptoms!). That evening, I took Young Living's Inner Defense, a supplement that makes me nauseated if I take it when I'm not sick but is good for warding off sickness if there is truly an immunity threat present. I took a bath with epsom salts, eucalyptus, and lavender oils. Epsom salt is great at soothing sore muscles and pulling out toxins, and the oils facilitate that effect. I again treated my feet with Thieves oil before bed. I have found that Thyme is so potent that it isn't wise to use it 2 nights in a row, I alternate it with another oil depending on my symptoms.

While I felt the worst on Saturday, by Sunday morning I was more or less normal! Which was good because I got a text at 7am saying that the instructor who usually teaches the 9am and 10:15am classes had a fever and I ended up teaching 3 Pilates classes on Sunday. By this time, I had no more achiness and I felt pretty good except for a pretty severe sinus headache. Unfortunately, I was in Plano all day and my essential oils were at home in Richardson.

By this time, I had identified that my symptoms were definitely seasonal allergies. Fortunately, I know what essential oils to use for allergies, so when I got home that afternoon I used my lavender and melaleuca (tea tree) oils. I also took another bath in epsom salts with eucalyptus and lavender to counter the achiness that was setting in from teaching three classes in a row. Again, I went to bed with Thieves on my feet.

It's Monday morning and I woke up (at 5am! to teach another class!) with a dry throat but absolutely no other symptoms. Did I cure myself of the flu? Probably not. Most likely, my workout Friday caused the achiness on Saturday, which means I did not have the flu. But it's clear that my immune system was compromised in some way, at some point, and I do think I was able to alleviate my symptoms and clear them up using my essential oils.

While this is definitely not a tutorial for how to cure yourself from the flu using essential oils, I hope it's at least a testimonial to how symptoms can be treated without conventional medications and how helpful and beneficial essential oils can be. Thanks, also, to Anna of Green Talk for her hydrogen peroxide treatment!