Showing posts with label beauty products. Show all posts

Saturday, March 16, 2013

Eco-friendly skin care without phthlates: K6 Skin Care

I'm super excited to tell you all about how I solved my conundrum when it comes to finding eco-friendly skin care without phthalates and toxins! I have been searching for a skin care line that does not contain phthalates, parabens, SLS, artificial colors, chemical fillers, etc., but also keeps my (aging) skin moisturized and blemish-free.

I'm sad to say that all the handmade products or kitchen recipes that I've tried in the past have been terrible for my skin. They have left my skin too dry, too oily, or caused me to break out. I've tried washing with oil, washing with honey, moisturizing with coconut oil, toning with hydrogen peroxide...all of it has been a terrible failure.

The products I've found that work best are, shall we say, usually less than ideal in their ingredients. I've been doing the best I could by at least buying from companies like The Body Shop and Whole Foods who have good fair trade and ethical practices and "probably" don't contain phthalates, but I've let a few other standards slip just to have nice skin.

Recently I met the wife of one of my husbands' coworkers who is a local naturopath. It is all I can do not to ask her 100 questions about that at the dinner parties we have attended! In fact, she has graciously offered to write a guest post for us soon to tell us all about naturopath practice and I can't wait! Aside from that fascinating fact (or perhaps because of it), she has also formulated her very own skin care line. I'll quote her here to explain why:
Early in my practice, I relied on "recipes" [for my clients skin care needs] I developed while working with herbs. I made recommendations to clients that had them in their kitchens throwing together various ingredients to make their own lotions and cleansers. Human error abounded, and the results were less than satisfactory
(sounds like my failed efforts!)
And here is my favorite part and, in my opinion, why K6 products work as well and BETTER than their non-green, non-natural conventional counterparts:
...As an ND, I am dedicated to practicing natural healing modalities, but I am not afraid to use technology safely where it will enhance the action of a natural element. I use this philosophy in every facet of my practice, and it permeates my skin care line as well.
This is a very good point. I don't think it's wrong to use technology to assist natural ingredients. The problem with a lot of the natural products I had been trying was the lack of preservatives, meaning that the containers became breeding grounds for bacteria. Sharon gave me a detailed ingredients sheet for each of the 3 products in the K6 line which explains, line by line, what each ingredient is and it's function in the product (including preservatives and why they were chosen). 

And did you catch that? Only 3 products in the line! Here they are:

Clean
For, um, cleaning. The best feature of this cleanser is that it also removes eye makeup! Yep, no more purchasing an additional product to clean your eyes. I find that it works best to rub a small amount on the closed eye, rinse, and then wash the entire face as usual.
Reveal
A powerful enzyme peel that leaves skin refreshed, not raw. It's extremely gentle but you'll also be amazed to see the amount of dead skin cells it removes (if you are fascinated by peeling things...this might be fun for you!). Never once made my skin raw or irritated. It is actually gentle enough to use on rosacea without exacerbating the condition.
Preserve
Anti-aging moisturizer that is extremely luxurious - you don't need much! Slows the breakdown of collagen, invigorates the production of more collagen, and inhibits the production of melanin.

Ever since I started using the K6 skin care line, I have actually felt guilty for not yet telling my readers about how much I love this skin care system. I wanted to be impartial because -- full disclosure -- they are also an advertiser on my blog. But I also do not advertise anything on this blog that I have not tried for myself or do not believe in. If I had tried this line and it hadn't worked, I wouldn't be writing this post.

A note on cost: you need very little of each of these products. For Clean, probably the size of a pencil eraser for eyes and the size of a dime for the whole face. For Reveal, you only use it once a day and maybe not even every day, I probably use about a quarter size squeeze for my entire face. For Preserve, less than dime size. So you can imagine how long each product will last. I'll probably buy Clean most frequently.

So, there you have it. It's what I am using right now, and I think I'll probably be using it for quite some time in the future. I hope that K6 helps you as much as it helps me. And remember, if you do choose to try the product line, you are supporting this blog!

Monday, February 25, 2013

Low Toxin, more eco-friendly hair color


Obviously, I dye my hair. No one is born with pink hair.

You might be thinking: what about the chemicals in hair dye? Is there a toxin free way to bleach and dye hair? The answer is: there is no chemical free way to bleach or dye your hair but there are ways to reduce your exposure to specific toxins and hair color systems that are more eco-friendly.

Henna - An ancient form of hair coloring based on the henna plant, henna is moisturizing and provides some pigment upon one application. You can re-apply over and over to build the shade up. Henna can lighten a few shades, but not much. Pure henna is almost always some form of red. I have found henna-based dyes in bright colors like pink, blue, and purple but I've also read that since the henna plant leaves obviously do not grow in those colors, those products are really mostly chemical dyes like any other chemical dye. The metallic components added to henna to produce these unusual colors can also react with traditional hair dyes, so be very careful mixing henna with other forms of dyeing or bleaching.

Highlighting - In general, highlighting with any type of product exposes your body to less direct contact with the dye because it doesn't sit on your scalp like all-over haircolor would -- it is typically applied with foils. At least, it doesn't cover all of your scalp when it does touch at the roots. Be aware of what bleaching agents are used in highlighting formula you use. My stylist did some research on ammonia in bleaching and found that some of the low-fume ammonia dyes contained just as much ammonia (or more) than the stronger-smelling ammonias, they were just more difficult to detect by smell. He prefers to use a low-ammonia version of bleaching rather than conventional ammonia disguised with extra chemicals to hide the smell.

Botanical and lower-toxin brands of professional color - The two main brands I found are Aveda and Pravana. Both are professional salon color systems and have a large spectrum of colors, traditional (browns, blondes, gingers) and alternative (pink, purple, blue, green, etc.). While these brands do utilize chemicals that are found in traditional color systems, they make a point to avoid phthalates, formaldehyde, and parabens. Both brands specifically avoid the use of petrochemicals or animal ingredients and do not do animal testing. Most of their product packaging is recycled and/or biodegradable.

What I have on my hair in the pictures you'll find on Instagram and Twitter is the Pravana VIVIDS for the pink, and their low-ammonia bleaching system for the base blonde. Did I have to bleach the crap out of my scalp for that light blonde? Yes, yes I did. Is that probably great for my hair? Probably not. At my last appointment, my stylist did a deep conditioning treatment and I do a weekly coconut oil treatment. I'll have to post more on that later. Overall, I am happy with my choice and plan to keep it up for as long as possible. I expect that 6 months is probably the longest I can do this before my hair becomes damaged.

Do you dye your hair? If so, have you tried lower-toxin alternatives or henna? What have been your results?


NOTE: I was not compensated in any way for the mention of these product lines, information is based on my own research and I pay for my pink hair out of my own pocket!

Saturday, January 26, 2013

Wine n cheese with "the girls", if you know what I mean

I had the opportunity this week to spend an evening at the fabulous Hotel ZaZa in uptown Dallas with a few fellow contributors to Dallas Moms Blog. The suite was decorated with old school Hollywood pinup photos, dark paint, leopard couches, and luxe touches. While we were there, we had wine and cheese and other snacks that I don't get to see much of in my house full of dairy-intolerant toddlers.

Other things that we just don't see a lot of in our house...

...Wacoal's line of bras and lingerie!

Yep, we were there for what was, in my case, a much need bra fitting!

I knew I was overdue for this fitting. Heather from CottonBabies wrote a great post about why we need to stop and take time to get refitted after having children, and just this past fall, Amber wrote about her fitting in NYC while attending BlogHer. After breastfeeding two babies in 3 years, I had very little idea what size I actually am anymore, and honestly I was a bit afraid to find out. This is why they gave us wine.

When I got back into the fitting room, the super hip New York bra fitting expert took one look at me and declared me a 30 band size. This was not a surprise, since I typically get 28 or 30 when I measure myself (at which point I give up). If you are familiar with ladies' undergarment shopping, you will recognize this as an extremely difficult band size to find. You cannot, for instance, just go to Target or even Victoria's Secret. Most brands don't go below 32.

Here's where I learned something, though: did you know that the cup size alters a bit for smaller band sizes? For example, a D cup for a 30 band size is smaller than a D cup for a 40 band size. Makes sense, proportionately. This news made me super excited, because I turned out to be a "larger" size than I thought I would be. All is not lost!

Fortunately, Wacoal bras come in band sizes from 28-46 and cup sizes from AA to HH. Their b.tempt'd line has some super cute styles, with a slightly smaller size range. Both lines are conveniently available at Macy's, Dillards, Nordstrom, and Neiman Marcus.

And now, I will leave you with some compelling facts from Wacoal's Bra Expert, Liz Smith:

Bra Facts

  • 8 out of 10 women wear the wrong sized bra 
  • A woman should be fitted once a year 
  • If you gain 5 – 7 lbs, your bra size will change 
  • It only takes 15 minutes to be fitted for a bra 
  • Most women wear their bras 1 – 1 ½ inches too big in the band and 1 cup size too small
  • The average woman has 27 bras in her lingerie draw and wears the same 2 bras repeatedly 
  • A bra should be worn once and then washed to extend her life
  • After washing and wearing a bra 100 times she needs to be replaced

Well, if that doesn't make you want to go out and get fitted, I don't know what does...
Good luck and good fitting to you!


NOTE: I was given a free fitting and bra from Wacoal at this event, but I was not obligated in any way to write about them or my experience. Opinions are my own. I just felt like you really hadn't had enough TMI posts from me lately. You're welcome.

Monday, January 07, 2013

The crazy hair project

If you follow this blog on Facebook or Twitter (and you should), you may have seen that this weekend I posted a link to the following YouTube video of a female drummer with amazing hair:


My husband found this video through one of his friends on Twitter, I think, and told me that it would be super great if I dyed my hair this way. I have to say, I thought it was a good idea. I asked you guys and my personal friends on Facebook and Twitter and got a lot of "go for it"s and no "um, no, you are too old". So if you DO think I am too old (which was my initial fear too), you better speak up now because I am now at the seriously-considering-it phase.

It's a good phase of life for me to do something like this because a) I do not have a "real" job -- just teaching Pilates part time and no one there cares if my hair is pink b) my kids are too young to be embarrassed by me yet, c) I'm not planning on being pregnant or trying to get pregnant in the next 6 months, so it's finally safe to dye my hairs, and d) if I wait much longer, I really WILL be too old.

I'm not going to get all single-white-female and exactly copy her look, I am probably going to keep my same haircut (maybe a little more razor cutting on the ends), and most likely just use my regular stylist for the cut. The color is going to take a little more thought. I am considering these options:

1) Pay for color at a real colorist. This could be pricey. I have several recommendations that I am going to research today. Since I'd have to do a platinum bleach first, I think it would have to be re-done every 2-4 weeks, right? The advantage of a professional is that they can target a shade that will look right with my skin. The disadvantage is that I wouldn't have any control over the toxicity levels of the product they're using.

2) Do it myself. I think I would probably go to the health food store and look for low-toxin bleaching options and then order Wild Streaks Henna in pink to do the highlights. Anyone ever tried this?

3) Some kind of hybrid of both. For example, go to a colorist for the first attempt and then try to replicate the touch-up myself with alternative products. I think the bleach part is the part I need to most professional help with because that's where I'd need to match appropriately with my skin tone.

Either way, Lauren has told me that I'll probably only be able to maintain this hair color for about 6 months before it destroys my hair and I have to stop.

Anyone else tried this, used henna color, or have any suggestions?

Wednesday, September 12, 2012

Homemade honey beauty treatments

Last night I was excited to be part of a gathering of bloggers at one of my favorite businesses, spa habitat, in West Village in Dallas to meet with representatives from the National Honey Board. It was a wonderful evening full of sweet treats and homemade beauty treatments!

After the initial mingling, we each sat down with our plate of honey-based snacks to a number of natural ingredients laid out in front of us.

Amy Bohn, owner of all four spa habitat locations, guided us through the creation of four separate facial treatments using ordinary kitchen ingredients and honey!

It was fun and intimidating to be at an event where you take all your makeup off, but many of the bloggers were fearless. Here, Jennifer from Real Posh Mom demonstrates a treatment on her hand...

Here's Bella from Bellaesque, who looked absolutely glowing by the end of the evening, trying the Honey Facial Wash (recipe below):


Valerie from Charmed Valerie rubbing on the Honey-Lemon Holistic Purifying Treatment (recipe below):


I can't remember what treatment Farah from The Dallas Diva was trying here, but it looks fun!

Things just got messier and messier as we went along, and even I put some gooey stuff on my face.

Ultimately, I learned so much about honey! Did you know that new research has recently been published proving that skin treated with honey retains and maintains more moisture than skin that had not been treated with honey? And honey can be used in conjunction with essential oils for amazing natural beauty results.

To show you some of the things that can be done with honey, here are 4 of the recipes we made last night so that you can make them at home for yourself! Please feel free to share!


Honey Facial Wash

1 teaspoon honey
1 drop of lavender essential oil
Warm water

Place honey on the tips of your fingers, and add 1 drop of essential oil to the honey. Rub the honey on your fingertips to warm the honey. Massage the honey onto your dry face (avoiding your eye area). Allow the honey to sit on your face for a few minutes, then rinse off with warm water and a facial cloth.

Honey-Lemon Holistic Purifying Treatment

1⁄2 fresh lemon, sliced in half
3 to 4 drops of honey
Cold water

Add drops of honey to the lemon. Rub the lemon on your face, emphasizing the T-Zone area (nose, chin, etc.). Leave the lemon and honey mixture on your face for 5 minutes, then wash off with cold water.

Honey-Lemon Exfoliating and Moisturizing Facial Scrub

1 tablespoon honey
2 tablespoons fine salt
1 teaspoon lemon juice
2 tablespoons organic olive oil

Mix honey, salt, lemon juice and olive oil in a bowl. Massage into the skin for 2 minutes and then rinse with warm water and towel dry.

Moisturizing Honey Banana Mask

1 tablespoon of banana
1 teaspoon honey
1 teaspoon plain Greek yogurt

Place banana, honey and yogurt into a bowl. Mash with a fork. Apply with your fingers to your face. Let dry for 20 to 30 minutes. Wash with a warm washcloth.

Enjoy!
And a big "thank you" to the National Honey Board, who can be found at Honey.com, and Amy at spa habitat for hosting!

Monday, September 03, 2012

At home dry scalp treatment

At home dry scalp treatment
I am not sure what I did to my hair and scalp the week preceding and during our trip to California, but I used something that really did NOT agree with my sensitive scalp. It got so bad that it was just like that time I didn't wash my hair for 42 days. I would go into detail on the symptoms but trust me, you don't want to know. It is totally gross.

At this point, I'm getting a little annoyed with how my sensitive scalp is constantly preventing me from being "green" when it comes to my hair products. I was determined to solve this flair-up with natural methods. A friend reminded me that tea tree oil  and olive oil are both great for scalps. I've tried a ton of "natural" and "organic" tea tree oil shampoos and they never work at all. However, I had some actual therapeutic grade Melaleuca Alternifolia (tea tree) oil from Young Living, and I always have olive oil.

Here's what I did.

Tea Tree & Olive Oil Mask

tea tree oil
olive oil
shower cap

I put a few drops of tea tree and a few drops of olive oil into my hands, rubbed them together, and massaged the mixture directly into my scalp in the affected areas. Since it absorbed rather rapidly, I re-applied multiple times to the same areas until they were saturated. I also dropped tea tree oil directly onto some of the more severe areas. I did a really good scalp massage with my fingertips. Then I covered my hair with a plastic shower cap and wore it for about an hour, possibly more. I actually fell asleep so I am not sure how long it was on.

I tried as best I could during the application of the oils to avoid getting the oils in my hair and focused on my scalp, but of course there was a good deal of oil in my hair. I have oily tendencies with my hair as it is, so I wanted to make sure all the oil was removed and my hair was still shiny and free of buildup. For this, I followed my regular hair washing and conditioning with an extra rinse with apple cider vinegar.

Apple Cider Vinegar Hair Rinse

1/4 cup apple cider vinegar
1 cup water

I put this mixture into a plastic squirt-style water bottle so that I can squirt it directly onto the ends of my hair while I'm in the shower. I rinse the ACV out of my hair - there is a slight odor but it goes away shortly.

This treatment was super effective - my itchy scalp was gone, the flaking was gone, and I got several random compliments on my hair that day including "Wow, your hair looks really amazing" and "Your hair smells really good!" (from my husband).

If you're struggling with a sensitive scalp, I'd highly recommend this treatment. I did it again about 4 days later to continue healing whatever damage I'd done and it worked just as well. Of course, you know where you can buy the tea tree oil!

Thursday, July 19, 2012

Why Crystal Deodorant "doesn't work"

I've finally put together the following vlog that answers one of the questions/comments that I get regularly when I talk about my lifestyle of avoiding toxic chemicals in my beauty and body produccts.

1. What do you use for deodorant?
followed by
2. That crystal deodorant didn't work for me/someone I know uses it and they stink

Short answer: I use a crystal deodorant in combination with an all-natural solid deodorant from Nature's Gate. The longer answer usually involves explaining why I avoid the chemicals in conventional commercially produced deodorants and antiperspirants, which I went into with more detail in my post about how I don't wear antiperspirant. I've also provided more educational links farther down this post below the video. Personally, I am avoiding aluminum and phthalates.

As for the follow-up/second question - I have found that when I've recommended crystal deodorant to personal friends, they always tell me "it didn't work". Recently I started asking questions about how the deodorant was applied and found that it is most likely a problem of incorrect application. There's really no way to describe this where you're not going to get bored and stop reading, so I made you a video. You're welcome

Here you are: why the crystal deodorant "doesn't work" {video here}


Resources on deodorants and antiperspirants:

Sunday, January 08, 2012

No poo: color treated hair and hair cuts

I've been "no poo" (without shampoo) for over a week now! I've got some helpful new information for those of you who have asked questions, so I'm going to have to combine two topics in this post: getting a "no poo" haircut and "no poo" for color treated hair.

How do you do "no poo" when going to get your hair cut?
When I started this experiment, I knew that I'd need a haircut soon. It was almost enough to make me delay the whole thing. The friend who originally inspired me to try "no poo" tried convincing her regular hairstylist not to use 'poo at her last cut, but the stylist wouldn't do it. I've heard that others have had the same issue. Of course, a stylist makes a great markup on selling hair product, so they're going to be reluctant to skip the products. Based on my own experience and the experiences of others, plus a little "guessing", here are my suggestions on how to get a "no poo" hair cut.

  1. Best case scenario: ask your stylist if you can arrive at the appointment "already shampooed". Then, of course, you'd only just wet your hair or use your baking soda/apple cider vinegar as you usually would when you shower, and go immediately to the appointment without drying or using any products. I think this would work best if you have an ongoing relationship with your stylist. I used to come "already shampooed" all the time when I was in college to save on the shampooing charge.
  2. Tell them the truth about "no poo". I think this method would work best if you've been doing "no poo" for a long time (several months) and are satisfied with the results - you've got your mixtures set and everything is working great. That way your beautiful hair can speak for itself and you might not get much pushback. It's hard to argue with great hair!
  3. Tell them you're doing a detox or an experiment. Since I was only 8 days into my "no poo" journey, I didn't have great hair to show off. My hair still looked and felt a little wonky so I had to admit what I was up to, but I didn't want them to try and talk me out of it before my experiment was completed. Letting them know that it might be only a short-term experiment helped them understand the condition of my hair was only temporary (I hope?). I actually told them about you guys (my readers) and said that I could not possibly use shampoo right now since so many people online were reading about this experiment!
  4. Be prepared to compromise. My compromise was allowing them to use conditioner. So yes, I used conditioner one day, 8 days into the "no poo"! But, conditioner was only used on the ends of the hair, not the scalp, which is what should supposedly be regulating the oil production in my hair during the "no poo" experiment. Also, half the ends that were conditioned were then cut off!
  5. Be open to their suggestions. My hair has been feeling much drier than everyone online reported at this point in their "no poo" journey. My stylist's advisor was able to suggest a few tweaks and a solution to this dryness that did not require shampoo. So even though you may get some pushback, and your stylist may be horrified by "no poo", keep listening! They have a great deal of knowledge to share!
Can I do "no poo" with color treated hair?
I am embarrassed to say that it did not even occur to me that my hair might react differently because I highlight it semi-regularly. I will say that my hair was much drier than everyone online said theirs was. Most people seemed to struggle with too much oil, but not me! I'd also noticed that when I blow dried my hair, it took much longer than usual. It used to take me 10 minutes or so to blow dry, but since I've been doing "no poo", I'd dry it for 15 minutes and still find wet spots.

I have the answers to these problems and hopefully some solutions, thanks to Brittany and Sue and the Aveda Institute of Dallas, where I get my hair cut. Brittany is the student who cuts my hair, and Sue was her advisor/teacher. Sue knew all kinds of things! These are the things she told me:


Problem: Color treated hair is more porous. Baking soda is a substance that makes things more porous. So you can imagine how fragile the baking soda can make color treated hair. This is also why it started taking so long to dry - my hair was just sucking up all the water and holding it in like a sponge.

Solution 1: If you have color treated hair, you don't want to use baking soda every day (like I was doing... oops!). Not even every-other-day. Probably more like once a week, at the most.

Solution 2: Keep up with the apple cider vinegar! Sue even suggested the ACV before she knew that was part of the "no poo" routine. So what I'm doing now is wetting my hair in the shower but only rinsing with the ACV. I haven't used baking soda at all since last week.

Solution 3: Use some kind of moisturizing oil on the scalp. Since I have a flaky scalp and the baking soda wasn't helping, Sue suggested that I massage Aveda's Balancing Infusion for Dry Skin into my scalp regularly. Because it's typically used on the face it doesn't block pores, and it won't lay heavily on top of hair to make it greasy. There are also a lot of other oils you could try, such as argan oil. I have also read about a lot of "no poo" folks using coconut oil, which is much cheaper, I'm sure. Whatever you use, just put a few drops in your palms and work it into your scalp before getting into the shower. I like to let the steam from the shower help the oil soak in for a while before rinsing with the apple cider vinegar.

So there you have it - my tweaked "no poo" routine for color-treated hair!
I started using the Balancing Infusion oil on my scalp and haven't used baking soda since last week. I rinse with apple cider vinegar at a ratio of 1/4 cup ACV to 1 cup water almost every day. I immediately saw an improvement in my hair. It's not nearly as dry!

How's your "no poo" going?

Related: See all "no poo" updates, including the one where I quit "no poo"!

Thursday, December 29, 2011

Going "no poo"

 I've been thinking about it for a while now: I am going to stop washing my hair with shampoo.

I have read a lot about the "no poo" method for hair, where you stop using traditional shampoo and conditioner and instead "wash" with baking soda and "condition" with apple cider vinegar (not white vinegar, as pictured above). As I read about it over the years, I saw a lot of people complain that it doesn't work unless you have fairly curly hair. Since my hair is pretty much stick straight, I had assumed it would not work for me.

Then my friend Rebecca (who is, like, my medicine woman!) tried it. She has hair that is straight, just like mine. Her hair looks great! You can't tell at all. She said that sometimes it takes up to 3 months for the hair to regulate, but that's OK with me. Her point is that we can always just start washing with shampoo again any time we feel like it.

So, I am on Day 2 of Not Shampooing My Hair! Day 1 (yesterday) I think I used too much baking soda and it got super crunchy in the back. Christian said it looked completely normal but the crunchiness drove me a little crazy. Today I used less baking soda and a ton of vinegar, and that seem to balance it out. It's much softer than Day 1, although still kinda crunchy-ish. I don't have any greasiness yet. My hair looks and smells normal.

I'll keep you updated on the progress!

Related: See all "no poo" updates, including the one where I quit "no poo"!

Wednesday, October 19, 2011

Homemade dry shampoo


The good thing about having longer hair is that I don't have to wash it as often. I have the type of hair that gets really greasy and limp by the second day, no matter what length. I had heard that dry shampoo could help me out, but it is so expensive! Also, I was never sure what was in it and whether there were phthalates. I looked at various brands for a while and noticed one ingredient in common: corn starch.

So I got a box of corn starch, sprinkled some on my hands, and put it into my second-day-dirty hair.
Voila! Dry shampoo!

For the longest time, I used only corn starch as dry shampoo. Then I read that some people use baby powder. So I started mixing baby powder and corn starch. It smells nice and works great!

Here's my super simple recipe:


Homemade dry shampoo
updated 9/2012 from reader comments for brunette hair

corn starch
baby powder
* cocoa powder
travel size squeeze bottle
funnel or piece of paper

  1. Put the funnel into the squeeze bottle or roll up a piece of paper to create your own funnel.
  2. Fill the container about 1/4 with baby powder. 
  3. If your hair is brunette, add the cocoa powder here. Add just enough to achieve a color that will blend. Remember that your hair will absorb the powder, so don't try to make it too dark because that isn't necessary. Just dark enough!
  4. Fill the rest of the way with cornstarch. Make sure to leave some room to shake.
  5. Shake the bottle to mix the powders. If you're having trouble evenly mixing the cocoa, use a chopstick to manually stir.
That's it! Because the bottle is so small, you can take it pretty much anywhere. It doesn't take a lot, either. I like to shake it onto my hands and then rub my hands into my scalp.

Enjoy!

Monday, June 27, 2011

Part 3 of Skincare/Makeup: Natural-ish acne skincare

I bet you thought I'd forgotten about Part 3 of this natural makeup/skincare series since Part 1 and Part 2 were so long ago!

It's not that I'd forgotten, it's just that I really wanted to wait until I could say: "I did it! I fixed my hormonal acne completely with natural methods!". Well, that day is never going to come. What I've got right now is skin that is under control just enough to cover with makeup. No actual breakouts (most of the time), but I can tell stuff is still happening under the skin around my mouth and the lower half of my face which is causing unevenness and red blotchiness.

When you last heard from me, I was going to try The Body Shop's skin care line under the advisement of this one particular Body Shop employee who told me that she could easily clear up my hormonal acne when I went in for a makeover in April. After stalking that store for about 2 weeks, I found out from another employee that the employee who said she could help me had quit. So I asked the girl who was there what she would recommend for hormonal acne. She really didn't know what hormonal acne was, but was kind enough to give me a brief rundown of their various lines. What I remember the original employee told me is that she would recommend combining several of the treatment lines, so I went through and combined them on my own.

Here is what I've been using over the last 6 weeks or so:

Cleansing: The Body Shop Seaweed Deep Cleansing Facial Wash
and about 3 nights a week I use St. Ives Apricot Scrub (from Target)

Eye treatment: Boscia Enlivening Amino AG Eye Treatment
(I have been using this for several years and I LOVE IT. This was not something new, but it is not something I would even considering changing)

Daytime: 
Sunscreen: California Baby No Fragrance SPF 30+ Sunscreen - this isn't technically for faces, but it is oil-free and the only sunscreen that uses non-nano zinc oxide, receiving a rating of 1 on the EWG Cosmetics database for toxicity
Moisturizer: The Body Shop Seaweed Matifying Day Cream

Night:
Only used around my mouth where breakouts would happen: The Body Shop  Tea Tree Blemish Fade Night Lotion - I have found that if I use this all over my face, it is too drying and irritating. If I use it only where I would normally have breakouts, it is fine.
Moisturizer: The Body Shop Vitamin E Nourishing Night Cream - this has anti-aging in it, which I really need. I put it on top of the tea tree oil lotion as well, to decrease the drying.

Now, aren't you so glad you waited?
I feel like I can HEAR the tremendous disappointment.
Sorry about that! This blog is nothing if not honest. But maybe you might find a product you'd like to try or a regimen that would help with hormonal acne!

* NOTE: I was not given any of these products for free by any of these companies. I bought them all with my own money and my opinions are my own.

Wednesday, April 13, 2011

The Body Shop phthalate free makeup: Part 2 of Skincare/Makeup

Recently I was given an opportunity to get a makeover at The Body Shop during "Beauty Live" event at the Galleria in Dallas.

Did you know that The Body Shop not only sells natural, sometimes organic, and phthalate-free makeup but that they also have skincare and makeup professionals that can help you tailor a skincare regimen to your skin and apply the makeup?

On the weekend that I visited The Body Shop in the Galleria, they had a special guest makeup artist visiting, Shalini Vadhera. I am not very savvy about celebrity makeup artists, but apparently SHE IS A HUGE DEAL and I should have been intimidated. Fortunately, I was too clueless to be nervous. She was very sweet and beautiful, and she did an amazing job on my eyes. You might not know it to look at me, but I LOVE eye makeup. My husband dislikes lipcolor so I actually do a lot of color on my eyes most days. I'll usually match my eye makeup and liner to my clothing, and I always use more than one shade of shadow. I'm not super good at it, but it makes me feel more confident.

Here is what you probably want to see most: before and after. (apologies for my terrible camera skillz)
The Body Shop Makeover
They were gracious enough to send me a professional head shot which they took - much better than my point-and-shoot:

And some un-professional shots of my eyes specifically:
Makeover eyes


Makeover eyes
The products used were from the "Brush with Fashion" collection - each item comes with it's own brush, which is genius because brushes are absolutely the best way to get a natural look. Those foam thingys that come with most eye makeup? Throw those things away! They do a terrible job. I never use them unless it is to wet the tip and use the shadow as liner. Even then, an eyeliner brush does a much better job. So I love that I can use the brush that comes with the eyeshadow.
The Body Shop Values and Campaigns
One of the best things about The Body Shop is how conscientious they are! The Body Shop is involved in a number of internal efforts to better our world, including a commitment to no animal testing, support of community trade, sourcing responsibly, respect for the environment, and treating their employees well. Externally, the company supports a number of campaigns to end sex trafficking worldwide, to stop HIV, and to end domestic violence.

Seriously, people, the fact that I could link to a page on their web site for each one of those individual efforts is AMAZING. I know very few companies who are that transparently and completely committed to ALL of those values and campaigns. I am so impressed.

And did I mention that all their products are phthalate-free!?

You might not have any idea how difficult that is to find, but take it from someone who actually asked their PR representative to delve deep into the company to confirm this - it's not easy to find a company who has done this. Part of the reason their products don't contain phthalates is because the company is based in the UK and the European Union has largely outlawed the use of phthalates in most products.

For an even better post than mine, check out another blogger's post on She Is Dallas about the event I attended. Then come back here real quick!

I kind of have a crush on The Body Shop.

Next up, I'll be trying out their skincare line. Please be patient with me, as I am still stalking the skincare specialist for her recommendations. Then, I want to give the products a full 14 days to work!

NOTE: I was given a free makeover and some products in exchange for an honest post about what I thought. These opinions are my own.

Friday, April 08, 2011

Part 1 of Skincare/Makeup: Homemade Acne Treatment

Now that I'm not pregnant anymore, my hormonal acne is back. Good times.

Being on oral antibiotics from the dermatologist does clear things up, but I can't go on those until after I'm not breastfeeding anymore. Also I hate the idea of being on pills forever and ever. The minute I go off them it comes back.

Let me veer off topic for a moment and tell you about 2 new ways that I am making myself even more neurotic online. I promise we'll come back to my skin.

First, the CSA co-op we joined has an online message board where the members exchange natural recipes and solutions for health and wellness. These people are way more crunchy than me. They make me look like I drive a Hummer and eat McDonald's every day, they are so freaking green and organic. They are the kind of people who drink nothing but raw goat milk that they drove 2 hours to buy and make their own laundry soap. I am not making either of those examples up. I would love to be as holistic and organic and green as they are, but most of the time I just feel crappy about how I still use Cascade dishwasher detergent and shave my legs. Still, every day I wake up and read all the posts from the day before on the message board and try to figure out how I can be more like them.

Secondly, I joined the Natural Parents Network on Facebook. This is the most fascinating group. People submit questions about their kids - behavior, illness, ways they are diapering or things they are doing with them... and other people in the group answer. It can be really helpful. My daughter was doing this weird thing where she screams for an hour every night for no reason and the people in the group suggested Hyland's colic tablets, wearing her in a wrap, and bouncing on an exercise ball. I did those things and she STOPPED. It was amazing. I feel good when I can also sometimes answer other people's questions from my experience. However, this group also makes me paranoid. Because there are a lot of people on there saying everyone should cosleep forever, you should breastfeed until your kids are like 3 years old, all antibiotics are bad, anti-vaccination, anti-circumcision, and any other thing that I would normally consider just a tad bit extreme. It makes me feel like I'M the crazy one for making the decisions we've made so far with our kids.

Back to my skin.

I really wanted to find something amazingly natural to get rid of the acne. I checked the co-op discussion board. According to them, I should wash my face with raw honey and use food-grade hydrogen peroxide as a toner and spot treatment.

I went to the health food store and got both.

In case you haven't seen raw honey, it's not like regular honey - it's semi-solid. It looks like this:
So I've been washing my face with raw honey twice a day and following it by a toner of food-grade hydrogen peroxide.

People on the health discussion board had great things to say about these two treatments.
"It made the skin really soft and the pores diminish (flatten out)."
"My friend who just turned 40 who has spent thousands on her cystic acne finally "resorted" to the raw honey as she knew I'd been pleased with it for years.  It cleared her up and she says her skin has only ever been that clear when on antibiotics.  She now tells people "I've spent thousands of dollars trying to cure my deep acne but now, I"ll stick with my $9 bottle of raw honey"."

But how did it work for me?

I am sad to say, it didn't.
I have been doing this for 2 weeks and I have to admit, my face is actually a bit worse.

I'm totally bummed because not only is my acne getting worse, but now I have failed at being green and organic. These people are over there making green smoothies and baking their kids homemade bread and I can't get my acne to go away without medication.

The good news is, I have been working with The Body Shop recently.
Part II of my Skincare/Makeup posts will be about the makeover I received last weekend. While I was there getting my makeup done, one of the skincare specialists took a look at my acne and said she can clear it right up with their products in only a few weeks! I am optimistic. Stay tuned for Part II, The Body Shop : makeup.  I hope to follow it soon with Part III, The Body Shop: skincare.
Fingers crossed!

Monday, August 16, 2010

It's true, I don't wear antiperspirant

I haven't talked about this much because I was afraid people would call me one of those crazy hippies. I mean, I do cloth diaper and baby-wear and I threw out all my non-green cleaning products way before we had kids. I make my own body wax out of sugar. But I've never talked about my deodorant.

But, it's true: somewhere around 2009, I quit using traditional antiperspirant/underarm deodorant products.

It was a big switch for me because I was actually using Secret Clinical Strength at the time. That stuff is potent. I don't think I sweated for, like, a year with that stuff!

That was actually what concerned me. There are sweat glands in our armpits for a reason. Is it really a good idea for me to be putting chemicals into my pores that will prevent anything from escaping? That's kind of weird if you think about it.

What's actually WRONG with sweating, anyway? It cools the body.

Of course, the odor is what we don't like. I certainly don't want to subject people around me to yucky smells, and I have a really sensitive nose, myself. I hate feeling icky. However, there are plenty of natural and organic deodorants that remove the offensive smell of sweat while still allowing your body to sweat.
Deodorants without phthalates, I might add.

Crystal Body Deodorant Travel Stick 1.50 OuncesI ended up with one of the crystal body deodorants. The kind you wet under the faucet and rub under your arms. When I know I am going into stressful situations, I will back it up with a solid herbal deodorant as well.

I think the hardest thing to get used to is being careful about what kinds of tops I wear. If I wear anything fitted around the shoulders, I have to be pretty sure I won't be in a warm or stressful environment, cause I will have moisture marks.

It's kind of a mental thing. Sometimes it does get warm and I sweat. I can tell it doesn't smell but there is something psychological that makes me feel like I should be ashamed of my sweat. I have to stop and tell myself, "This is normal, there is nothing wrong with sweating. If it bothers someone else, that is just a construct of society". It sounds dumb, but I believe it is true.

Tuesday, June 15, 2010

Pink Dandy: body products without phthalates

As you may or may not be aware, I am always on the lookout for body products (scrubs, lotions, perfumes) that contain no phthalates. I first became aware of the toxicity of phthalates after watching the film America the Beautiful (more information on phthalates). I have to say, it's been really tough finding body products that smell good but don't have phthalates, although it is getting better. During my pregnancy, I was especially vigilant about what I put on my body because phthalates are absorbed by the body and can negatively impact reproductive development. Since phthalates are most often found in scented products (they are used to create the smell), I actually used unscented body lotion from Whole Foods which I mixed with a few drops of various essential oils. That was all I could find that was safe!
How I wish I had known about Pink Dandy then! Pink Dandy makes luxurious skin care and scented candles that are: cruelty free, phthalate free, and vegan. Pink Dandy is a spin off company of Raw Beauty that was created by Janae Chang in 2004. They use essential oils to create their rich scents, just like I had been doing, only their combinations smell MUCH better than mine did!

I had a chance to sample their Lightly Whipped Hand and Body Lotion in "Lemon" and the Pink Lace Roll-On Perfume Oil in "Butterfly Orchid"*. The lotion was very refreshing and light - not sticky or heavy, and the scent was great to put on before a hot day outside! I loved the richness of the body perfume oil. I honestly have not been able to use perfume at all since I before became pregnant, because it is impossible to verify whether most perfume contains phthalates (the information is usually withheld from the ingredient list). Even though I am not nursing anymore, Little Sir pretty much gums or "kisses" my entire neck and arms daily, so I don't want to chance him getting a mouthful of phthalates. With Pink Dandy, I don't have to worry about that and I can smell good too!

Pink Dandy has an Etsy store and an online store. I would definitely recommend checking out this page for a list of their scents (scroll down to the bottom of the page for the list).

What's even cooler than amazing body products and candles that are vegan and contain no phthalates??
Getting a discount and free samples!

You can take 15% off your order from Pink Dandy by using the code PRLOVE before July 31!
With every order from Pink Dandy, you receive free samples of their products!
I love this because I am sucker for sample sizes that can be taken on airplanes.
* Traveling to BlogHer '10 by plane, anyone? Grab a sample! *

I am super excited to share this find with you, be sure to pass on this information to any of your pregnant friends or moms of small kinds who might be looking to reduce baby's exposure to phthalates but don't want to give up smelling great!


* DISCLAIMER: I was given a free 8 oz. bottle of lotion in "Lemon" scent and a free roll-on body perfume oil in "Butterfly Orchid" to sample for this review.

Saturday, October 31, 2009

Lemon Coconut Oil Body Scrub

Quite a long time ago, the folks at Tropical Traditions sent me a jar of Extra Virgin Coconut Oil to try out, along with a book about the benefits of coconut oil. The book itself I did not find very helpful because it was mostly talking about how great the coconut oil is and how many ways it could be used but then not giving instructions on how to use it (i.e, "it is great for the hair" but no instructions on how to effectively apply it to hair to receive these benefits).

So it sat in my pantry for quite a while before I read a brief blurb in Glamour magazine about how some celebrity (I believe either Gwenyth Paltrow or Cate Blanchett) makes her own body scrub made of sugar, coconut oil, and lemon juice. There was no recipe, just those ingredients mentioned in the article.

I went online looking for coconut oil body scrub recipes, and found several. The ones with more than 5 ingredients I disregarded. I tried a few but actually did not like any. Then I decided, what the heck, I will just throw the 3 ingredients mentioned in Glamour in together to make my own recipe. I messed with my ratios some and this is my end result:

Jenny's Lemon Coconut Oil Body Scrub

3 parts organic sugar
1 part organic lemon juice
extra virgin coconut oil as needed
drops of essential oils, as preferred (I used Sweet Orange and Sandalwood)

I found that the rough organic sugar I keep in my house was actually too rough on my skin in the first batch, so the second batch I put the sugar in a coffee grinder for a few minutes to make it finer. I would highly recommend doing this if you use rough organic sugar, to avoid irritating your skin. For the coconut oil, add only as much as is needed to make the mixture moist. This varies by the amount of sugar you use.

As with previous body scrubs I've used, I apply after body wash, rinse it off, and it leaves a thin coat of oil which absorbs into my skin before I dry off. I like that I can customize it with my own essential oils as well.

*NOTE: I did receive a free jar of coconut oil from Tropical Traditions for this recipe

Saturday, August 08, 2009

Spa Habitat Dallas: thumbs up!

I've posted in the past about how I switched to making my own body sugar and using it for cheap, "green" hair removal. If you'd like to start yourself, just follow the link. It's easy and, if you make sure to use baby powder on the clean dry skin first, relatively painless (in my opinion).

I was very proud of myself in July when I was still able to reach around the baby tummy and do the sugaring. But this month, there is no getting around it - literally. I can't see or reach anything that needs to be sugared, if you know what I mean.

Early into the pregnancy, I anticipated this happening and had scoped out local organic spas to find somewhere that did sugaring rather than using traditional wax. I found Spa Habitat, an organic spa with locations in Dallas (the West Village), and in Plano. West Village is nearby so I visited them on Thursday.

I want to highly recommend this spa! I have forgotten the name of my esthetician, but I have another appointment in 5 weeks so I'll remember then. This was West Village, so expected a little bit of uptown pretentiousness, if you know what I mean. But they were all very down-to-earth. The environment was relaxing, just as you would want a spa to be, while at the same time earthy.

The esthetician was very knowledgeable and does a lot of pregnant ladies. I felt very comfortable and it didn't seem pretentious to me at all. They had a good selection of products out front, but I was late and didn't have time to browse too much. However, she did recommend a product to me to help with my ingrown hairs on my legs (sorry if that is TMI...but this is a symptom of the pregnancy for me).

I was impressed by this product: they are not kidding about the products being natural! There was nothing on the label that I could not pronounce. I can't even say that about the things I've bought at Whole Foods or through Arbonne when I was with them! So, additional a shout out to Suki products. I may be buying more of those!

To seal the deal, when I went to pay, I saw this at their register:
If you can't read it, it says: "For every service performed this year at our spas, we will plant a tree with Trees for the Future in developing countries" Neat!

The whole experience made me very happy and I am looking forward to going back!

Wednesday, July 29, 2009

Zoya phthalate-free nail polishes: Twitter giveaway

I've blogged in the past about my search for phthalate-free nail polish and the discovery of Zoya polish, which is my fave! I have started buying a bottle almost every time I visit Whole Foods.

I also follow Zoya on Twitter, and they are having a contest now through Monday, August 3 to reach 5,000 followers. If they do, they'll Twitter a discount code on August 4 that will give all their followers free nail polish!! I really want this to happen, and as soon as you try the polishes, you will too!

So if you Twitter, go to Zoya's page and follow them now!

Monday, June 08, 2009

Green nail polish: phthalate free

I know I haven't reviewed any fabulous new products lately, and to be honest, I haven't tried a ton recently, either. But since it is summer, I have been searching for a great phthalate-free toe nail polish. I don't polish my fingernails because it is pointless, I use them as tools too much to waste the polish, which comes off in about 3 hours. I do take care of my feet, though.

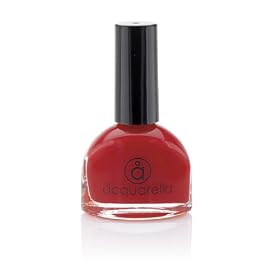
It's not just being pregnant that makes me want to avoid toxicity in polish - I was searching for a good phthalate-free polish even before becoming pregnant. My first attempt was Acquarella nail polish, which I ordered from Amazon.com at the steep price of $18. This brand was recommended by Good Housekeeping.

I wasn't too terribly impressed - it wasn't the color I wanted, which is the disadvantage of having to order online. Also, it was watery upon application (it is water-based) and took more coats to get coverage. Surprisingly, it was extremely difficult to remove. Regular nail polish remover didn't really work, it took quite a bit of scrubbing.

What I really wanted was to be able to purchase polish locally so that I could see the colors. I had see the Zoya brand polishes at Whole Foods, but the WF employees could never tell me whether it contained phthalates or not. I had a lot of trouble finding any information about this on the Zoya web site as well. I finally used Google to search Zoya's web site for the word "phthalate" and found that they do claim to be phthalate free on the Zoya blog, I can't even find the blog post now. I would include a picture of the bottle, but their web site has image protection saying all Zoya images are property of Zoya...what?

While it is very weird that Zoya should be so protective of images of their nail polish bottles, I have to say that the nail polish is definitely the winner!! I wore it all week in DC, and aside from some chips that I inflicted myself by putting on shoes too soon after polishing, it held up great. Even better, it is only $5 and comes off easily with regular nail polish remover (I know, I know, I need to get some natural nail polish remover, but I have to use up the old stuff first...what do you want me to do, dump it down the sink??).

The only downside is that Whole Foods doesn't carry the clear polish, so I can't put a base coat and top coat on this eco-friendly polish. That does shorten its lifespan a little, as well as causing my toenails to turn a little yellowish. But, that is what lemon juice is for, I guess...

Saturday, January 24, 2009

Making homemade body sugar


Following up on my post about body sugaring as a "green" form of hair removal, I recently ran out of what I bought from Whole Foods and decided to make my own body sugar. This was touted as one of the main advantages of body sugaring by the sites that recommended it - that it can easily be made at home with common kitchen ingredients: sugar, water, and lemon juice.

There was a good video on YouTube showing how someone made their own, so I used that recipe. Making this stuff was much harder than it looked, though.

Body Sugar recipe:
2 cups sugar
1/4 cup lemon juice
1/4 cup water

My first try was unsuccessful. I was using a 3 cup, dark non-stick pot, and there was so much foam that I had trouble telling what color the liquid was. I looked for other tips online and found that some people recommended using a candy thermometer, so I did that. I tried keeping it at 250 degrees, but I had to keep the burner very low to keep it from boiling over.

making body sugar
This pot was too small, it overflowed when the sugar boiled
It seemed to get the right consistency, but upon cooling, it was not sticky enough to remove hair.

On the second try, I used a larger stainless steel pot. Turns out, this is the secret. The first pot I was using was only slightly larger than the contents, which didn't allow the mixture room enough to boil up and then down again. Using a 3 quart stainless steel sauce pan was a much better idea.

I used the second batch this morning to remove hair and it worked great!

So, here are my tips for making your own body sugar:
  • Use a pot that is at least twice as large as the mixture before it starts boiling. I recommend a 3 quart pot.
  • I am not sure if the stainless steel made the difference, but I do recommend stainless steel over a non-stick pan simply because you can see the color of the mixture better in light-colored stainless steel.
  • Do use a candy thermometer and maintain a temperature of 240-250 degrees.
  • Do the hard-ball candy test - put a drop of the mixture into a glass of cold water. When it is ready, the drop will bend and spread but not dissipate in the water.
For more info, read my previous post on eco-friendly hair removal.