Showing posts with label green living. Show all posts

Tuesday, March 19, 2013

What is The Green Sisterhood and #greensisters?

GSHIf you follow me on Twitter, you might have noticed an avalanche of tweets this weekend with the hashtag #greensisters. I do apologize for the volume of grouped tweets, it should only have happened once. When you see tweets or shares with the hashtag #greensisters, you can know that I am sharing something from another blogger who is a member of The Green Sisterhood with me. You might be asking, "what is The Green Sisterhood?". The short answer is that we're a group of bloggers who blog about green living, the environment, various forms of low impact living, handmade and DIY, and who are all passionate about making positive changes for our future.

What does The Green Sisterhood do?

If you are a blog reader or someone interested in green living, climate change, or environmental advocacy, The Green Sisterhood is a great place to learn! Subscribe to our weekly email to receive summaries of what each sister is blogging about this week. Or, visit the main GS blog on Fridays for a weekly reading list of the best of the sisters' posts each week.

If you are a blogger (green or not), The Green Sisterhood hosts free blogging-related webinars regularly. Today at 12pm CST we'll be hosting Lara Galloway for a webinar entitled "Blogging is NOT a business".

If you are a business or PR professional, The Green Sisterhood is a great way to reach people who are interested in your product, service, or book. With a combined 2 million page views per month, all the green sisters function as a unit to reach a relevant audience through our individual blog voices and social media channels. You can contact us for rates and options by emailing info {at} greensisterhood {dot} com!

What does The Green Sisterhood mean to me?

On a personal level, I feel really privileged to be a part of this group of women. I would not be tweeting out links to these ladies' posts if I wasn't truly interested in what they have to say. They encourage me daily to keep up a greener lifestyle and to advocate for change when I might otherwise be silent. I've found that The Green Sisterhood encourages me when I get discouraged about blogging or making positive changes in my own life and the lives of others. It can be difficult to "be green" when no one around you is doing it. I don't know how many times I've had friends ask me a question about green living that I can answer by passing on a link to a post from one of my green sisters. Some of us are greener than others in various areas. Together, we have experience in nearly every area of sustainable living, or we know someone who does.

I feel like we also serve as sounding boards for each other when it comes to blogging decisions. For example, if I have a question about how to handle the business end of blogging, I ask these ladies. We had a great discussion just last week on working with PR reps, the points which we discussed will likely come up when I speak at BlogHer in Chicago in July. When Google shut it's RSS reader shut down, there was Karen Lee with a post about alternatives to Google Reader. They've recently encouraged me to (reluctantly, awkwardly) embrace Google Plus.

I hope that you love The Green Sisterhood as much as I do and that you'll follow along with us as we move forward for a greener future!

Saturday, March 16, 2013

Eco-friendly skin care without phthlates: K6 Skin Care

I'm super excited to tell you all about how I solved my conundrum when it comes to finding eco-friendly skin care without phthalates and toxins! I have been searching for a skin care line that does not contain phthalates, parabens, SLS, artificial colors, chemical fillers, etc., but also keeps my (aging) skin moisturized and blemish-free.

I'm sad to say that all the handmade products or kitchen recipes that I've tried in the past have been terrible for my skin. They have left my skin too dry, too oily, or caused me to break out. I've tried washing with oil, washing with honey, moisturizing with coconut oil, toning with hydrogen peroxide...all of it has been a terrible failure.

The products I've found that work best are, shall we say, usually less than ideal in their ingredients. I've been doing the best I could by at least buying from companies like The Body Shop and Whole Foods who have good fair trade and ethical practices and "probably" don't contain phthalates, but I've let a few other standards slip just to have nice skin.

Recently I met the wife of one of my husbands' coworkers who is a local naturopath. It is all I can do not to ask her 100 questions about that at the dinner parties we have attended! In fact, she has graciously offered to write a guest post for us soon to tell us all about naturopath practice and I can't wait! Aside from that fascinating fact (or perhaps because of it), she has also formulated her very own skin care line. I'll quote her here to explain why:
Early in my practice, I relied on "recipes" [for my clients skin care needs] I developed while working with herbs. I made recommendations to clients that had them in their kitchens throwing together various ingredients to make their own lotions and cleansers. Human error abounded, and the results were less than satisfactory
(sounds like my failed efforts!)
And here is my favorite part and, in my opinion, why K6 products work as well and BETTER than their non-green, non-natural conventional counterparts:
...As an ND, I am dedicated to practicing natural healing modalities, but I am not afraid to use technology safely where it will enhance the action of a natural element. I use this philosophy in every facet of my practice, and it permeates my skin care line as well.
This is a very good point. I don't think it's wrong to use technology to assist natural ingredients. The problem with a lot of the natural products I had been trying was the lack of preservatives, meaning that the containers became breeding grounds for bacteria. Sharon gave me a detailed ingredients sheet for each of the 3 products in the K6 line which explains, line by line, what each ingredient is and it's function in the product (including preservatives and why they were chosen). 

And did you catch that? Only 3 products in the line! Here they are:

Clean
For, um, cleaning. The best feature of this cleanser is that it also removes eye makeup! Yep, no more purchasing an additional product to clean your eyes. I find that it works best to rub a small amount on the closed eye, rinse, and then wash the entire face as usual.
Reveal
A powerful enzyme peel that leaves skin refreshed, not raw. It's extremely gentle but you'll also be amazed to see the amount of dead skin cells it removes (if you are fascinated by peeling things...this might be fun for you!). Never once made my skin raw or irritated. It is actually gentle enough to use on rosacea without exacerbating the condition.
Preserve
Anti-aging moisturizer that is extremely luxurious - you don't need much! Slows the breakdown of collagen, invigorates the production of more collagen, and inhibits the production of melanin.

Ever since I started using the K6 skin care line, I have actually felt guilty for not yet telling my readers about how much I love this skin care system. I wanted to be impartial because -- full disclosure -- they are also an advertiser on my blog. But I also do not advertise anything on this blog that I have not tried for myself or do not believe in. If I had tried this line and it hadn't worked, I wouldn't be writing this post.

A note on cost: you need very little of each of these products. For Clean, probably the size of a pencil eraser for eyes and the size of a dime for the whole face. For Reveal, you only use it once a day and maybe not even every day, I probably use about a quarter size squeeze for my entire face. For Preserve, less than dime size. So you can imagine how long each product will last. I'll probably buy Clean most frequently.

So, there you have it. It's what I am using right now, and I think I'll probably be using it for quite some time in the future. I hope that K6 helps you as much as it helps me. And remember, if you do choose to try the product line, you are supporting this blog!

Wednesday, March 13, 2013

Green My Routine: cleaning


It's been a while since I did my first Green My Routine, and I admit I've been reluctant to do Part 2 of the series just because it is so labor intensive! There are a lot of links involved and can be a lot of picture taking to illustrate. I solved this reluctance by taking on something that seems like a fairly simple part of my daily routine: cleaning.

It's simple because I really rely on only a few products to get most of my cleaning done. I admit up front and remind you that I do sell Young Living essential oils and products so you will see them featured heavily in my arsenal. I believe in them because they are powerful and effective, and I signed up with them, well, basically to get a discount because I don't make ton of money off of it. I think I break even. That said, you are welcome to buy any of these product from me on my Young Living page if you are so inclined to do so. If not, just read for information!

My cleaning products:

Thieves Household CleanerYoung Living Thieves household cleaner - Disinfectant that I use on everything: in the kitchen on the counters, the dining table, the kids toys, the kids potty seats, diaper pails, and also in our bathrooms for any surface my son pees on as well as the bathtub and shower. I also put it in my reusable microfiber mop sprayer and mop the floors with it. Ingredients are: Thieves oil and surfactants to allow oil to mix with water. That's it!

White Vinegar - Use this mostly on our microfiber couches for milk spills, but I also clean the windows with it. I often make orange vinegar to mitigate the smell, which my husband hates.

Shaklee Basic H2 Organic Super Cleaning Concentrate - Use this almost exclusively in the kitchen for greasy things like our glass stovetop. I also use it sometimes on the dining table.


Bon Ami Cleanser Powder - this is a simple, natural version of Comet. No bleach.

Baking soda - use this for anything that needs abrasive action, mostly in the kitchen and with dishes, but I have been known to scrub all sorts of things with baking soda!

Steam cleaner - for floor, no cleaning fluid necessary -- just water!

Homemade Lysol alternative - For disinfecting trash cans, large groups of toys, and larger surface areas.

Hydrogen Peroxide - Food-grade version that I bought from a health food store, I dilute at a 1:11 ratio with water to make the diluted strength we are accustomed to buying in a drug store. I spray hydrogen peroxide on my fabric shower curtain to remove mold stains. I also use hydrogen peroxide to remove pretty much any stains on tile, grout, or even fabric. It does a great job with blood! Often used in lieu of bleach.

I think that pretty much covers my entire cleaning arsenal for the whole house! Not a lot of products, I just keep some of each in every major location on both floors of the house.

Have I missed anything? If you have a question about how I clean various things with these 8 products, please leave it in the comments, on my Facebook page, or tweet me and I'd be happy to answer!

Friday, March 08, 2013

Handmade fair trade empowering women: Amani ya Juu

You might not want to get out of bed early enough to work out today, but what if you had to get out of bed to carry water from a well to your house before you go to work in the morning or you wouldn't have water for bathing and cooking all day? Here is what a day is like for Esther in Liberia:
Esther, a 39-year-old mother and grandmother, wakes up at 5:30am each morning. “I carry the bucket to the pump. If you cannot carry the bucket soon, you will not get water!” she shares with wide eyes that giving the impression that this lady has had to deal with a dry pump on more than one occasion, and doesn’t plan on letting it happen again.

Esther prepares food for her family and sends her children off to school. Then, she sometimes goes to the market to buy food for her family or her bucket. She runs a micro business from her head---she sells pepper, spices, candies, ground pea candy (peanut brittle), and other treats out of a plastic bucket she carries all over the community.

At [work], Esther cuts cloth or learns to sew. She has only been at Amani for about a month but already feels intense community amongst her coworkers. “We are here together, friendly...if I am not here, I am missing these people,” she says, looking about the room.

After work, Esther often goes to night school, where she is currently completing 9th grade. Her favorite part about school is reading “They got some good stories in it!” she says of her school books, then rattles off the plot of a story she is reading this week about some farmers with a car---“their own car!”---she exclaims.

Esther works during the day at Amani ya Juu (“peace from above” in Swahili). Amani is a sewing and training program for marginalized women based in East Africa. Women from many African nations and cultures are learning to work together through faith in God who provides a higher peace that transcends cultural and ethnic differences. Amani is committed to holistic development. Women gain experience in purchasing, bookkeeping, stitching, quality control, management, and design. As new women enter the program they are mentored in quality workmanship. Emphasis is placed on ethical business practices and harmonious relationships with people of different backgrounds. Amani’s wide selection of high-quality handbags, home and kitchen décor, jewelry, and children’s items are made out of local African materials. The sale of products sold by volunteers and in Amani shops enables each woman to earn consistent income.

I learned about Amani ya Juu from a blog reader here in Dallas -- what a small world! She knew about my heart for empowering women to succeed through hard work and based on an inner peace. When she contacted me, I took a look at the Amani site and there is a little collage of my favorite products from Amani:


Clockwise, starting with the grey bag:

Safari On The Go Bag - $72
Ruffled Glove and Spoon Set - $28
Stuffed Zebra - $10
Kikoy Elephant Mobile - $44
Monrovia Wristlet - $18

I hope these cute products will appeal to you, but most of all that you will consider supporting the ladies of Amani ya Juu with your purchases. I've had a chance to sample one of the Amani cosmetic bags, and I can attest that it is very well-made. The ladies of Amani put care and love into their work.

To help spread the word, I'd like to give away a small cosmetic bag made by Sandra in Uganda:

Please help me spread the word about Amani ya Juu by entering the giveaway, tweeting about Amani and their mission, and following them on Facebook.
a Rafflecopter giveaway

Monday, February 25, 2013

Low Toxin, more eco-friendly hair color


Obviously, I dye my hair. No one is born with pink hair.

You might be thinking: what about the chemicals in hair dye? Is there a toxin free way to bleach and dye hair? The answer is: there is no chemical free way to bleach or dye your hair but there are ways to reduce your exposure to specific toxins and hair color systems that are more eco-friendly.

Henna - An ancient form of hair coloring based on the henna plant, henna is moisturizing and provides some pigment upon one application. You can re-apply over and over to build the shade up. Henna can lighten a few shades, but not much. Pure henna is almost always some form of red. I have found henna-based dyes in bright colors like pink, blue, and purple but I've also read that since the henna plant leaves obviously do not grow in those colors, those products are really mostly chemical dyes like any other chemical dye. The metallic components added to henna to produce these unusual colors can also react with traditional hair dyes, so be very careful mixing henna with other forms of dyeing or bleaching.

Highlighting - In general, highlighting with any type of product exposes your body to less direct contact with the dye because it doesn't sit on your scalp like all-over haircolor would -- it is typically applied with foils. At least, it doesn't cover all of your scalp when it does touch at the roots. Be aware of what bleaching agents are used in highlighting formula you use. My stylist did some research on ammonia in bleaching and found that some of the low-fume ammonia dyes contained just as much ammonia (or more) than the stronger-smelling ammonias, they were just more difficult to detect by smell. He prefers to use a low-ammonia version of bleaching rather than conventional ammonia disguised with extra chemicals to hide the smell.

Botanical and lower-toxin brands of professional color - The two main brands I found are Aveda and Pravana. Both are professional salon color systems and have a large spectrum of colors, traditional (browns, blondes, gingers) and alternative (pink, purple, blue, green, etc.). While these brands do utilize chemicals that are found in traditional color systems, they make a point to avoid phthalates, formaldehyde, and parabens. Both brands specifically avoid the use of petrochemicals or animal ingredients and do not do animal testing. Most of their product packaging is recycled and/or biodegradable.

What I have on my hair in the pictures you'll find on Instagram and Twitter is the Pravana VIVIDS for the pink, and their low-ammonia bleaching system for the base blonde. Did I have to bleach the crap out of my scalp for that light blonde? Yes, yes I did. Is that probably great for my hair? Probably not. At my last appointment, my stylist did a deep conditioning treatment and I do a weekly coconut oil treatment. I'll have to post more on that later. Overall, I am happy with my choice and plan to keep it up for as long as possible. I expect that 6 months is probably the longest I can do this before my hair becomes damaged.

Do you dye your hair? If so, have you tried lower-toxin alternatives or henna? What have been your results?


NOTE: I was not compensated in any way for the mention of these product lines, information is based on my own research and I pay for my pink hair out of my own pocket!

Thursday, February 21, 2013

On conventional and natural ear fluid treatment


A few months ago, I began to suspect that my 3 year old son, Little Sir, might have some hearing issues. It wasn't his language development, that was on target or ahead, but he just seemed to be missing a lot of things I said to him in a normal tone.

Another odd coincidence: every time since he was 1 year old when he'd had the standard hearing-machine tests at the pediatrician, the machine "hadn't been able to get a reading" due to "fluid in the ears". Never an infection -- he hasn't had an ear infection since he was 16 months old -- but always "some fluid in the way".

Our pediatrician referred us to a pediatric Ear, Nose, and Throat (ENT) specialist that practiced at a private hospital. Pricey, for someone as under-insured as we are. At this ENT, they did auditory testing with a machine and by playing sounds for him in headphones and allowing him to respond by throwing blocks into a bucket. He thought that was a pretty fun game! The results of these tests: significant hearing loss. He actually could not hear anything at a conversation level. They bypassed the ear drum and testing the capacity of the actual sound conducting parts of his head (?) and he does have the capacity to hear, the fluid was just keeping the ear drums from vibrating at all. This ENT suggested both ear tubes and removal of adenoid fluid. When we got the estimated cost of surgery from this private pediatric facility, we nearly had a heart attack.

We decided to get a second opinion, and while we were waiting for the second appointment, try holistic and chiropractic methods to help reduce the fluid in his ears. Some things we did to help alleviate the fluid between appointments:


  1. pediatric chiropractic adjustment of the spine (twice)
  2. specific adjustment of the ears themselves, both by the doctor and then she showed us how to do it at home
  3. essential oil blend (thyme, lavender, melaleuca) targeted to prevent ear infections, applied behind the ear
Despite these treatments, when we went to the second ENT appointment and all the auditory and throwing-blocks tests were re-done, he came back with the exact same hearing loss and the exact same recommended treatment: ear tubes and possible removal of adenoid tissue.

At the first diagnosis, I was not enthusiastic about putting Little Sir under anesthesia. All the work we do to reduce our childrens' exposure to toxins, and we were just going to fill him up with crazy sedatives! Still, after inquiring among the "green" blogger community, I could find no alternative treatments that we had not already tried. In fact, I found several "green" bloggers who attested to having tubes in their own ears as children (I did, too) and having tubes put in their childrens' ears with great improvement.

In the end, we went with the conventional treatment. We are OK with taking some unconventional or alternative routes but, in the end, his hearing is not something we were willing to risk. He had the surgery this Tuesday and is doing great. He says that he can hear much better. 

Has anyone else faced this decision with their children? Did you go with conventional or alternative treatment?

Monday, February 18, 2013

My green smoothie recipe (sort of)

I posted this photo yesterday of a green smoothie I created that contained 5 fruits and veggies (peaches, blueberries, kale, avocado, and bananas) plus probiotics, because I used my homemade kombucha in it:


I've been doing green smoothies a lot recently to increase my antioxidant intake during cold and flu season. If I start to feel a little worn out, I try a green smoothie and quick nap during the kids' nap rather than caffeine.

I'd like to post a single green smoothie recipe but honestly, my recipe changes every time based on what I have in my refrigerator and freezer. What I'll do instead is post a list of things that are in almost every smoothie and the ingredients that vary, to give a kind of formula for green smoothies that can be altered to fit your needs.

Every smoothie:

2 cups dark, leafy greens - Usually kale, but sometimes swiss chard, spinach, or even arugula.
Yogurt - Now that my son is dairy-free, I use cultured coconut milk yogurt. Leave out the yogurt if you are using kombucha for the liquid, those don't play well together!
1/2 cup frozen bananas - I buy "day old" bananas in a bag at the grocery store, slice them up, and keep them in the freezer so I can just grab a few. Because they are frozen, they work well in lieu of ice cubes, which helps the smoothie be creamier rather than watery. I wouldn't go much above 3/4 cup of bananas because using too many can make the smoothie too thick.
1/2 - 1 cup Frozen organic berries - Berries have great antioxidants, but since they aren't available year-round, I stock up during the summer months and freeze them. Blueberries freeze the best and are most cost effective for our area.
1 cup+ unsweetened fruit juice - Since I don't use ice cubes, I have to add a liquid. Most of the time, I use apple juice because it is the most cost effective. As I've mentioned, I have used kombucha in lieu of juice but you definitely have to add honey and/or peanut butter to balance out the tart-ness of kombucha.
Food grade lemon essential oil - The original recipe I started using for my green smoothies used lemon juice, but sometimes I don't have lemon juice. I always have lemon essential oil, and it's a lot more concentrated. I usually use 2-3 drops. Again, have to leave this out if you use kombucha because that would make the smoothie way too acidic/tart.

Optional/varying ingredients:

1 scoop flax powder - for protein
honey - when I'm using a more tart green, like arugula, or when I use kombucha instead of juice, it needs sweetening
peanut butter - if I end up with too many watery or tart ingredients, I'll need peanut butter to balance out the acidity
fresh fruit - most of the time I eat fresh fruit plain!
veggies - I particularly like to add celery to a kale and apple smoothie
different juices - I've used carrot juice, kombucha, cranberry juice, orange juice...
raw ginger - or other herbs/spices, but this is the main one that I use to settle my stomach
soaked cashews - I blame Stephanie for the fact that I frequently have this raw vegan staple on hand!

Here's an example of a typical smoothie without kombucha:

1/2 cup bananas
1/2 cup yogurt (or cultured coconut milk)
2 cups kale
1 scoop flax powder
1/2 cup frozen blueberries
1 cup apple juice
3 drops lemon essential oil
1 scoop flax powder
2 tbsp honey

I have a pretty good Black & Decker blender, so I just throw everything in and blend it all at once. I usually have to blend for around 2 minutes total.

Kids love to participate in making smoothies! I unplug the blender and let my toddlers throw the ingredients into the blender container. Then we sit down with our cups and drink the smoothies. If I have leftover, I pour it into silicon popsicle molds for special "treats" later.

What are your favorite green smoothie ingredients? Anything I'm missing?

Monday, February 11, 2013

How I make kombucha

Have you heard of kombucha? It's a fermented drink made from tea and a live organism called a scoby, which is a bacteria or fungus. It sounds gross, and I'm not going to lie, it looks kinda gross too...but it tastes good! And the resulting tea is full of good bacteria (probiotics) that can help balance your stomach and strengthen your immune system.

My husband thinks I am a little crazy because this is what the scoby looks like the jar:


So while it is brewing I make sure the cloth I cover it with is long enough to hang over the edge and cover the organism.


How do I make kombucha?

1. Get a scoby and at least 1/2 a cup of the kombucha it created from someone. If you are interested in making your own and live in the Dallas area, let me know -- my scoby makes a baby each time I brew, so I should almost always have one available.

2. Brew black or green tea with at least 1/2 cup of sugar per 1/2 gallon. I have seen people say use only white, processed sugar, but I didn't know about that until after I brewed my 2nd batch and I used organic raw sugar both times. I think the white sugar keeps the possibility of contamination lower so I will use that going forward.

3. Put the tea into a glass jar and it sit out overnight to reach room temperature.

4. Wash your hands with apple cider vinegar. If you wash using traditional soap, even soap made with essential oils, the germ-killing properties of the soap can also kill the scoby!

5. Gently place the scoby into the jar and cover with a cloth or towel secured with a rubber band. You want it to get plenty of air but keep bugs out.

6. Put the jar in a warm (70 degrees or above) place out of direct sunlight. A friend of mine keeps hers in the pantry, but I have no room in my pantry and my cupboards are all colder than the rest of the house, so I keep mine on the counter because it is not in the sunlight.

7. Allow the kombucha to ferment until it reaches your desired strength or taste. It is ready when it has formed a baby scoby on top of the jar, but you can let it sit longer if you'd like.

When you are ready to drink it, you can refrigerate the kombucha if you want or drink it room temperature. I have noticed that it gets bitter fast when refrigerated, and I don't like the way it tastes, but some people do.

Things that can go wrong.
I killed my first scoby, I think because I forgot to add the sugar and tried to add it later. Either bacteria from the spoon I stirred it with or the stirring motion itself must have killed the scoby. You can tell that you have failed if your jar grows any kind of mold. Mold is NOT what you want. You will have to throw everything out and start over with clean jars and new tea. The good news is, you can compost the scoby.

I recently read an article on WebMD that claimed homemade kombucha is rather dangerous. I had actually not heard anything about this before and, as you might have noticed from my Instagram and Twitter, I have allowed my children to drink it. I do dilute what they get with water (because fermentation can create alcohol in the beverage, the equivalent to what you'd get with any fermenting fruit), so they get a very small amount. But they looooove it and ask for it. Little Lady goes so far as to try and take the jar down from the counter sometimes.

Basically, kombucha is one of those weird things that crunchy people do because it might be healthy or not. I don't know how long I'll keep it up, but it's nice for now. For more info on kombucha, my fellow Green Sister Tiffany Washko posted on NatureMoms about making kombucha also.

What do you think about kombucha? Yes or no?

Monday, February 04, 2013

Essential oils and cold/flu symptoms

Thieves 15ml. + Thieves Hard Lozenges + Inner Defense ~ U.S.

I was offline for a while this weekend with the suspicion that I might have contracted the flu, since this year is supposedly an epidemic and I forgot to get my flu shot. I was just sure that someone in our family was going to get sick since I just published this post about Natural Cold and Flu Prevention and Treatment on Dallas Moms Blog. The minute I tell the whole internets that neither of my children has had anything more severe than a cough this season, I am just sure we'll be waiting in a doctor's office for some Tamiflu within the week.

Friday morning I did a more hardcore workout than usual -- the heat wasn't working in our studio, so I constructed a routine that would keep us warmed up and sweating throughout. Friday night I started to feel "off". Quick side note: the more often you work out, the faster you can tell when your body is off balance because you know you usually feel during and after workouts, and you can tell when you feel differently. That afternoon I had a green smoothie and took a nap. I immediately had my husband help me with Anna from Green Talk's hydrogen peroxide treatment! I went to bed with Thyme oil on my feet as well. Thyme is very effective in causing your body to sweat and purge out anything that might be starting to take hold.

I actually felt pretty good Saturday morning but quickly started to ache all over and I felt exhausted. I started to panic that I had the flu, but there was no fever. I took a warm shower and rubbed my neck and back muscles with lavender and peppermint oil, putting Thieves oil on my feet. I had another green smoothie and napped again (shout out to my husband who played with the kids while I treated my symptoms!). That evening, I took Young Living's Inner Defense, a supplement that makes me nauseated if I take it when I'm not sick but is good for warding off sickness if there is truly an immunity threat present. I took a bath with epsom salts, eucalyptus, and lavender oils. Epsom salt is great at soothing sore muscles and pulling out toxins, and the oils facilitate that effect. I again treated my feet with Thieves oil before bed. I have found that Thyme is so potent that it isn't wise to use it 2 nights in a row, I alternate it with another oil depending on my symptoms.

While I felt the worst on Saturday, by Sunday morning I was more or less normal! Which was good because I got a text at 7am saying that the instructor who usually teaches the 9am and 10:15am classes had a fever and I ended up teaching 3 Pilates classes on Sunday. By this time, I had no more achiness and I felt pretty good except for a pretty severe sinus headache. Unfortunately, I was in Plano all day and my essential oils were at home in Richardson.

By this time, I had identified that my symptoms were definitely seasonal allergies. Fortunately, I know what essential oils to use for allergies, so when I got home that afternoon I used my lavender and melaleuca (tea tree) oils. I also took another bath in epsom salts with eucalyptus and lavender to counter the achiness that was setting in from teaching three classes in a row. Again, I went to bed with Thieves on my feet.

It's Monday morning and I woke up (at 5am! to teach another class!) with a dry throat but absolutely no other symptoms. Did I cure myself of the flu? Probably not. Most likely, my workout Friday caused the achiness on Saturday, which means I did not have the flu. But it's clear that my immune system was compromised in some way, at some point, and I do think I was able to alleviate my symptoms and clear them up using my essential oils.

While this is definitely not a tutorial for how to cure yourself from the flu using essential oils, I hope it's at least a testimonial to how symptoms can be treated without conventional medications and how helpful and beneficial essential oils can be. Thanks, also, to Anna of Green Talk for her hydrogen peroxide treatment!

Tuesday, January 22, 2013

6 tips: switching from antiperspirant to natural deodorant

Woman putting natural deodorant on underarm

If the weather is still chilly where you are, now is the perfect time to get started on the switch from toxin-filled, potentially cancer-causing antiperspirant to a safer natural deodorant. I say this because the heat of summer is not exactly the time to work on preventing body odor while using natural products that work differently than what you've been accustomed to using. Get used to the difference now and you'll be a pro by the time the warm weather kicks in and you rely more heavily on your natural odor preventing routine.

It takes a little bit of experimentation to figure out what works for your body in a natural deodorant. If you've been using antiperspirant, you are accustomed to not sweating. A deodorant will allow you to sweat. The right deodorant will take care of the odor that the sweat would cause, but not the moisture. It took me a while to get used to that feeling, but after a while I learned to accept the way my body functions naturally.

Below are 6 tips that will help your transition from antiperspirant to deodorant go more smoothly:

1. Watch what you eat. If you are putting a lot of processed foods, white flour, heavy meats, and sugar into your body, the sweat that comes out is going to smell worse. Sweat is your pores' waste, and if you are putting junk in, you'll get junk out. Focus on fruits and vegetables, whole grains, and a minimum of red meat and you will see a reduction in your body odor overall, even without deodorant.

2. Watch what you wear. Sleeveless tops are now your friends. Any shirt or top that fits tightly around the underarm is NOT. Think layers of looser fitting jackets or sweaters over tank tops, even in the summer. Or just a tank top. Whatever you do, avoid long sleeved body suits. Remember, any time you perspire there will be moisture.

3. Shave your underarms every day. Let me be the first to tell you that even though I am a fitness instructor and wear capri workout pants multiple times a week...I rarely shave my legs. Too much effort! But when it comes to underarms, I never take a break. Hair traps bacteria and, therefore, odor. Having any length of hair in your underarm area will exacerbate the odor causing bacteria that you want to avoid. So take a few seconds every morning to shave. Guys, I don't know what to tell ya...societal norms just aren't on your side on this one.

4. Find a brand that works for you. Everyone's body chemistry is different. What works for me (crystal deodorant first, followed by Nature's Gate solid) might not work for you, so experiment. But not with Tom's of Maine. I have heard from multiple readers and personal friends (as well as from my husband) that Tom's of Maine's "natural" deodorants are terribly, terribly ineffective overall. I realize that this brand is the easiest to obtain because it is manufactured by Colgate and is therefore in Walmarts and Targets nationwide, but please avoid it. Try nearly any other brand but this brand. Seriously. Trust me. Check GoodGuide and the EWG SkinDeep database for brand recommendations.

5. Try teas. In the summer, drinking iced peppermint or other mint teas will help to naturally cool your body from the inside, helping you to sweat less. In the winter, try warm teas such as chamomile to help calm and keep you hydrated.

6. Be committed. Because this is going to take some experimentation, keep your goals in mind. Why are you taking steps to clean your body and the way you live? For your health? For your children? Due to pregnancy or holistic treatment of chronic illness? Whatever the reasons are, realize that they will not change even when you encounter challenges.

I'd love for you to make the switch with me, and hopefully these tips will help with the transition.
Please let me know in the comments or via Facebook or Twitter if you do make the switch!

Friday, January 11, 2013

7 Quick Takes #47


--- 1 ---

This is going to be really fast because I need to go nap. I'm teaching at 6:30am 3 mornings a week now instead of only 2, and it's really hard for me to get up at 5am 3 days a week if I don't get enough sleep somehow. Naps have really been standing in lieu of going to bed early since we have so much going on most evenings.

--- 2 ---

Speaking of teaching Pilates, if you are in the Plano area and would like to try out our Megaformer Pilates classes, we are running a great special on VOICE Daily Deals here. I recommend the 3-pack deal. Come see us!

--- 3---

vIf you follow me on Facebook and Twitter, you know that I dyed my hair pink. Here's a quick pick I took just now wearing very little makeup.

I have discovered that this haircolor really looks better if I wear some kind of color on my lips but, oops, I wasn't doing that in this picture.

--- 4 ---

Hopefully this will be invisible to you, the readers, but I'll probably be migrating this blog to WordPress (it's on Blogger now) some time in the next few months. I am worried and reluctant to make this move, but there are reasons bigger than my personal preference that are involved. Some of the primary goals are to make the site much more usable for my readers, and make commenting easier.

--- 5 ---

Everyone here is freaked out about the flu, how about where you are? My friend EcoKaren did a great post today about natural ways to prevent the flu, aside from or in addition to vaccination. I highly recommend checking it out! As for handwashing, remember that last week I blogged about how to make your own antibacterial hand soap from essential oils and castille soap.

--- 6 ---

It's January 11 and I have already completed one of the items on my To Do List: making our family blog books for 2011 and 2012. They take about 2 weeks to arrive from the publisher. Can't wait to see how they turned out!

--- 7 ---

Have to give one last shout-out to my sponsor, Happy Feet, Healthy Body! Along the lines of flu prevention, remember that she has hand sanitizer pens made from essential oils. If you've just started a New Year's workout routine (or you take one of my classes, haha!), I highly recommend her Lavender bath salts - lavender soothes sore muscles and will help you sleep at night.


~~~
Well that's all for this week, be sure to visit Conversion Diary for links to more 7 Quick Takes Fridays.

Wednesday, January 09, 2013

Everything eats chicken...except me

It turns out that chickens are sort of difficult to keep alive. Besides being rather dumb, or possibly because they are rather dumb, pretty much everything preys on them.
Successfully.

All that to say: one of our newest chickens was killed on Saturday by a hawk. We were home, it was the middle of the day, we had just come home from the store as a family and the kids were at the table for lunch. My husband saw the hawk swoop on down and attack our largest chicken. The mistake it made was trying to drag the chicken under the chicken wire of the chicken run. The now-no-longer-with-us chicken got stuck and the hawk abandoned it. The hawk flew up onto a nearby telephone pole and watched from afar. After a while, it gave up and went away.

We learned that there was no way to process the chicken for food. I know that seems cruel, but...it seemed like such a waste to bury a chicken that was otherwise untouched. Not that I eat chicken -- I don't eat meat except for fish. The rest of the family does. Still, there was nothing else we could do, we buried it. In the backyard. Well, I didn't -- Christian did.

I tell you this just to inform you of our ongoing chicken journey. My sister-in-law suggested that we go with something more like this for housing our chickens:

Monday, January 07, 2013

The crazy hair project

If you follow this blog on Facebook or Twitter (and you should), you may have seen that this weekend I posted a link to the following YouTube video of a female drummer with amazing hair:


My husband found this video through one of his friends on Twitter, I think, and told me that it would be super great if I dyed my hair this way. I have to say, I thought it was a good idea. I asked you guys and my personal friends on Facebook and Twitter and got a lot of "go for it"s and no "um, no, you are too old". So if you DO think I am too old (which was my initial fear too), you better speak up now because I am now at the seriously-considering-it phase.

It's a good phase of life for me to do something like this because a) I do not have a "real" job -- just teaching Pilates part time and no one there cares if my hair is pink b) my kids are too young to be embarrassed by me yet, c) I'm not planning on being pregnant or trying to get pregnant in the next 6 months, so it's finally safe to dye my hairs, and d) if I wait much longer, I really WILL be too old.

I'm not going to get all single-white-female and exactly copy her look, I am probably going to keep my same haircut (maybe a little more razor cutting on the ends), and most likely just use my regular stylist for the cut. The color is going to take a little more thought. I am considering these options:

1) Pay for color at a real colorist. This could be pricey. I have several recommendations that I am going to research today. Since I'd have to do a platinum bleach first, I think it would have to be re-done every 2-4 weeks, right? The advantage of a professional is that they can target a shade that will look right with my skin. The disadvantage is that I wouldn't have any control over the toxicity levels of the product they're using.

2) Do it myself. I think I would probably go to the health food store and look for low-toxin bleaching options and then order Wild Streaks Henna in pink to do the highlights. Anyone ever tried this?

3) Some kind of hybrid of both. For example, go to a colorist for the first attempt and then try to replicate the touch-up myself with alternative products. I think the bleach part is the part I need to most professional help with because that's where I'd need to match appropriately with my skin tone.

Either way, Lauren has told me that I'll probably only be able to maintain this hair color for about 6 months before it destroys my hair and I have to stop.

Anyone else tried this, used henna color, or have any suggestions?

Thursday, January 03, 2013

Homemade Antibacterial Hand Soap with #EssentialOils

Looks like we are well into flu season and there are several nasty stomach bugs and upper respiratory things going around as well. Aside from keeping my kids home from school one of the two available weeks of preschool/Mother's Day Out in December (!) because I thought they might be getting the stomach thing (one random diarrhea and one vomited), no one ever got sick, and instead they ran around like crazy people not wanting to stay inside the house all day. Their immune systems are ridiculously strong, I guess? My husband, on the other hand, actually got pneumonia. The kids were never affected. I've had some ongoing coughing but I've been treating it with essentials oils and the usual immunity boosting supplements.

Anyway, regardless of how much Thieves oil you use or elderberry syrup you chug (we do both!), hand washing is always key to preventing the spread of whatever-is-out-there.

There has been a lot of concern in the green and medical community in the past 10 years about the overuse of antibacterial hand soap, particularly because it most often contains a chemical called Triclosan. Triclosan has been found to cause hormone disruption in animals and is currently being reviewed by the FDA for safety. Even the FDA's own site restates that antibacterial soaps may not provide significant benefit over plain soap and water.

Over here, we use plain ol' castille soap with peppermint essential oil, which I dilute at a 1:2 ratio with water and put into foam dispensers.

However, I will admit that after the salmonella incident with the chickens, I felt that we might need a little additional disinfecting property to our soap. Thieves oil blend contains antibacterial properties but, unlike Triclosan, does not interfere with the body's natural functions because it does not contain synthetic chemicals of any kind. You can order Thieves Oil hand soap from Young Living (I sell it, of course), but honestly I already had Thieves oil and soap, so.... I just made my own! Here's what I used:


Dr. Bronner's Peppermint Castille Soap
2 drops Thieves blend essential oil
2-3 drops lemon essential oil
Foam hand soap dispenser (approx. 8-10 oz bottle)

My foam hand soap dispensers are all from commercial soaps I've bought in the past and used up. I have one for each of our bathrooms now, and one for the sink. For what it's worth, Clean Well is my favorite soap and dispenser (because the label comes off cleanly), but it's SUPER expensive and my homemade version is way cheaper!

I fill my soap dispenser 1/3 of the way with castille soap (this is a Method hand soap bottle).
Then I fill it the rest of the way with filtered water.

After that, I add the 2 drops of Thieves and 2-3 drops lemon.

SHAKE REALLY WELL.

Important: you'll notice a separation/settling of the content, so make sure you give the bottle a good shake now and then before using. I have also noticed that the mixture turns darker when exposed to sunlight -- essentials oils do degrade in sunlight -- so it is best to keep in shaded area out of direct sun or use a darker bottle (the older Clean Well bottles are tinted).

Let me know if you try this recipe, and what you think!


NOTE: Of course, I sell the essential oils mentioned in this post. No, I did not pay my own self to mention...myself. That doesn't even make sense, but the disclosure laws require me to say it. There are also links to various Amazon products in this post, and those are affiliate links. If you buy the products mentioned, I get 2 cents or something. About twice a year I get $10 from them, so any time you do buy a recommended product you are supporting this blog and my sad, horrible Amazon addiction.

Saturday, December 29, 2012

To Do List 2012: How did I do?

Oh look, it's almost 2013! Time to look back at my To Do List from 2012 and see if I accomplished any of it.

1. Eat better.
To make this a little more measurable, I'll just say that I want to get back to eating at least 5-7 whole fruits and veggies per day.
Sort of done. I have been doing a lot better as far as cutting out the extra sugar and carbs but I'm probably still not up to 5-7 veggies a day. Mostly because I give all the fruits and veggies in the house to my kids, and there are rarely any left for me. Those things are expensive! But I am still drinking my NingXia Red, which is packed with antioxidants, so I think that helps.

2. Resume meal planning.
I did pretty good with this probably 6 months out of the year, off and on.  At one point, I got depressed about how much money we spend on groceries and stopped even trying. Then we found out that Little Sir is dairy and soy intolerant and that threw another wrench in the planning because I can't use Food On The Table or eMeals since they all contain dairy ingredients that I can't always substitute. I am currently off the wagon. This is going to show up on the 2013 list again, dang it.

3. Regular exercise.
I want to aim for 3 days a week.

Oh thank God, one that I can actually cross off the list. Thanks to becoming a Lagree Fitness instructor at Ultimate Pilates Plano, I am now in better shape than I was before the kids. I actually do have six-pack abs, not lying. I would love to take pictures but that seems really indecent for a family-friendly blog. OK, I did take pictures in the mirror once but I haven't shown anyone. However, this is not bragging because it is very hard work and continues to be very challenging. It's not like I am saying "oh look, I have magically great abs! Whee! Be jealous!". Nooooo, I write routines that are specifically heavy on moves targeting my transverse abdominal muscles and my obliques, and I do those routines for 50 minutes, at least 3 times a week. And I must mention, I teach these routines in my classes so if you want to work on your post-baby body like I did...you know where I am!

4. Attempt monetization of this blog
"Attempt monetization" is not a very measurable goal, but let's just say I'll research and apply for some ad networks and work on ways that I could increase my readership. Such as participating in blogger link-ups.

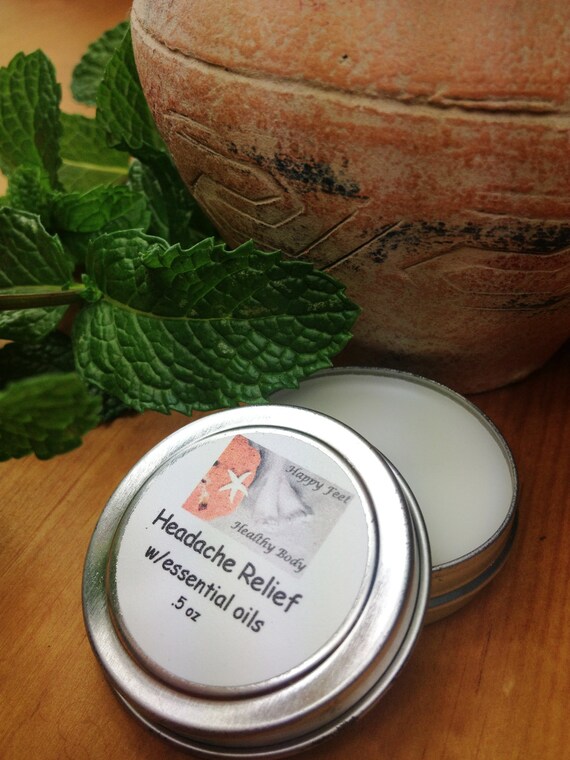
First of all, I would like to give yet another shout-out to my wonderful sponsor Tanya of Happy Feet, Healthy Body who has an Etsy shop selling handmade bath and health products that are completely free of toxins but also provide the natural healing powers of essential oils. Please consider supporting this blog by purchasing her products! She has an excellent headache remedy and an amazing lavender lip balm that I use every night. And if you are in the Dallas area, she can even arrange for local delivery rather than paying for shipping.

I feel like I have done some positive work in this direction. I have also joined up with a number of other green bloggers via The Green Sisterhood and some closed Facebook groups. I actually don't participate in a ton of link-ups, but that is because I am very picky about my topics and I don't do a lot of giveaways. I feel like I am heading in the right direction and I'm looking forward to 2013!

5. Start potty learning with my son
This is pretty much done! Now that we've addressed the stomach issues of dairy and soy intolerance and provided both negative and positive incentives (positive alone did not inspire him), he has very few pee or poop accidents. Well, thank goodness that only took about 7 months.

6. Decorate the kids' rooms
I think they look a lot less bare now. I put the animal and letter decals up in my son's room and hung his name picture and handprints, and he accumulated a number of additional toys and books to fill up some of the extra space. I put up a lovely tree decal in my daughter's room and bought some curtains. She also got a bookcase with bins like brother's and a bureau for her clothes. I am sure I could do more but there's not a ton of space. I like what we have right now!

7. Plant a garden
Hahaha, that was pretty much a failure except for the bell peppers, but there is a good reason that I didn't specify that it had to be a successful garden. I ended up getting enough bell peppers that, when chopped, fill up a plastic baggie (I know, PLASTIC, I lose my green cred yet again) in the freezer. That is a significant crop considering how small they were. But they died in the snow on Christmas Day, so that's done. Since we have such a nice raised bed setup now, I'll try again next year.

Wednesday, December 19, 2012

Last minute teacher Christmas gift

I just wanted to do a quick post on my favorite teacher "thank you" gift, since I know we all love to thank our childrens' teachers at the holidays. Instead of some trinket that might break or sweets that they might otherwise try to avoid (my son's preschool teacher is gluten-free so I wanted to avoid anything that she couldn't eat anyway) -- how about flowers?


My favorite place to get beautiful, unique, and inexpensive flowers is Whole Foods or Central Market. In fact, I got the flowers for my wedding bouquet at Central Market!

Since my son's teacher spends more time with him than my daughters' once-a-week Mother's Day Out teachers, I also added a personalized May Books lined notebook to her gift. May Books are hand-sewn without using plastic or synthetic glue with nasty chemicals. The covers are cloth-based so that they wear to a soft finish.

It's not too late to buy some fresh flowers today!
What is your favorite teacher gift to give or receive (if you are a teacher)?

NOTE: I did not receive any compensation or product for the mention of May Books, although the owner is a personal friend of mine. I just love her products, and I pay for them just like everyone else!

Wednesday, December 12, 2012

Unconventional reuses for wire hangers

When we got married, my husband and I agreed that we hate wire hangers. Now that I am all crunchy and whatnot, I am sure that wire hangers are probably the most "green" choice, but I still hate them because they put weird dents on the clothes. Also, they look tacky. Which are very shallow reasons, but there you have it.

So we got rid of ALL our wire hangers and replaced them with wooden hangers. We bought huge packs of wood hangers from IKEA and from Bed, Bath & Beyond with coupons.

Occasionally, wire hangers would come back into our lives via consignment sale purchases and I would promptly donate them to Goodwill.

This week I realized that I probably shouldn't have given all those wire hangers away.

First came the Pinterest project. Being our first year to decorate our house for Christmas, I figured that we probably needed a wreath. I was horrified to find that wreaths cost something like $70 at Hobby Lobby? What?!! So, of course I went to Pinterest and found that you can make a wreath out of Christmas ball ornaments and...a wire hanger. I dug around in the garage and actually found one that escaped Goodwill. The result:

Pinterest Christmas ornament wreath

Not too bad!

And then...

I managed to outdo myself in the "weird" department today by flushing and entire cloth diaper down the toilet. You may have seen this tweet.

The kids were napping, so my husband was all set to leave work and buy a toilet snake (whatever that is? we are definitely the least handy homeowners EVER) and/or call a plumber when Facebook and Twitter suggested that I try a wire clothes hanger.

Guess what?

Yes, that is the previously flushed cloth diaper, a wire clothes hanger, and a needlenose pliers.

And there you have my eco-friendly reuse ideas for wire coat hangers: wreaths and fishing things out of toilets. Let me also pass along a little advice: do not throw out ALL your wire clothes hangers, no matter how ugly or annoying they are!


*NOTE: I was not paid by anybody to mention IKEA, Bed, Bath & Beyond, or toilet snakes. 

Wednesday, December 05, 2012

Green find: Squooshi reusable food pouches

When I saw my friend Calley post pictures of a new reusable baby food pouch on Instagram a few months ago, I practically heard angels sing! As you may or may not be aware, at least one of my children is an extremely picky eater and a) will not eat fast food or restaurant food, and b) has trouble eating his veggies. Not saying who it is. Our solution for the last 3 years has been to buy the disposable baby food pouches and carry them along whenever we go out to eat so that he has some kind of nutrition other than rolls or rice (the only other things he'll sporadically eat while out). It's also a good way to sneak in some extra quinoa protein or amaranth grain. I would wait for the pouches to go on sale at $1 apiece and buy them in bulk. I always have a stash in my pantry.

I'm sure you know where this is going...oh, the guilt over throwing away plastic pouches with big plastic lids that are never, ever going to biodegrade! I would throw them away and cringe, thinking "I am sorry, earth!". But even though I'd tried a silicone version of a reusable pouch (HORRIBLE), I could not find an alternative.

Then...Squooshi!

I am totally in love with these adorable reusable food puree pouches! What is even better is that they come in completely plastic-free packaging:


There are four adorable characters in The Animal Series and two sizes: 4 oz. and 6 oz.

Of course, the #1 question is: do they leak?
I have been using them for about 2 weeks and my answer is NO! I even put (goat) yogurt into them for our car trip over Thanksgiving and no leaking at all. The bottom is sealed by a VERY STRONG ziplock-type zipper. The trick is to make sure that you swipe away any puree from the zipping mechanism before closing. This tip is included in the insert that comes with the Squooshi pouches.

What did my kids think?


They both give Squooshi a thumbs-up!

One more item to address: yes, Squooshi pouches are made of plastic. However, at this time there is no plastic-free alternative to the not-so-disposable pouches and in my opinion these are the BEST as far as functionality for reusable options. The plastic used in these pouches is BPA-free, phthalate-free, PVC-free, and lead-free. In addition, since you will always hand-wash these pouches, they will not be exposed to the high dishwasher temperatures that could facilitate plastic chemical leaching.

For an additional viewpoint on Squooshi, surf on over to my friend Nancy's blog, Surviving and Thriving on Pennies.

If you're ready to let go of the "disposables" and take a step toward environmentally friendly nutritious snacking on the go, you can head on over to the Squooshi store and pick up some cute stocking stuffers!

NOTE: I was given the four pouches show for free in exchange for this honest review. All opinions are my own.

Friday, November 30, 2012

7 Quick Takes Friday #46


--- 1 ---

I am super, super excited to have a new sponsor for this blog, Happy Feet, Healthy Body -- a local reflexology business and essential oil products Etsy shop. If you are looking for local, handmade and safe soaps and essential oil remedies such as her popular Headache Relief or Pamper Pack, please support her and this blog by clicking and purchasing her products! Reflexology is also a great way to help boost your immune system and recover faster from respiratory issues at this time of year. She is a wonderful source of essential oils knowledge -- she has given me advice several times in the past!

--- 2 ---

We have 3 new chickens who have not been eaten by a bobcat yet. They are young and haven't started laying yet. Just this week they started "talking" to me, so I have hopes they'll start laying soon.

--- 3---

I spent an hour scanning anti-dandruff shampoos with my GoodGuide app yesterday to get my ridiculous scalp under control. I tried a natural/organic scalp shampoo for several weeks and my scalp has gotten so, so much worse. This area is still a great big Green Fail for me right now.

--- 4 ---

Speaking of selecting responsible personal care products for ourselves and our families, please head on over to my post about chemical safety in our personal products on Dallas Moms Blog. This month, the contributors are having a contest to see whose post gets the most views and I'd love to win one of the prizes!

--- 5 ---

I have found an amazing new product that is really going to reduce the waste we produce for the kids' lunch and I can't wait to tell you about this week!

--- 6 ---

I think I am finally on the end of this ridiculous respiratory whatever-it-is that I have had for a week. I did take some OTC meds but I never had to go to the doctor, so I am hopeful that I can go a full year without any kind of antibiotics. I really need to break that cycle.

--- 7 ---

I just have to leave you with this amazing and wonderful video that will make your eyes explode. It is 4 years old but I still think it is the best. Too bad the band broke up and we will never see anything this cool again.


brite futures (npsh) - sophisticated side ponytail from thatgo on Vimeo.


~~~
Well that's all for this week, be sure to visit Conversion Diary for links to more 7 Quick Takes Fridays.

Wednesday, November 28, 2012

Apparently, I don't clean

Cleaning Lady (Day 11)
This is how I clean. Obviously.
photo by stephcarter on flickr

Has your family got the upper respiratory thing that's going around? Well, both my kids were sick for less than a day thanks to Thieves Oil, apple cider vinegar, and elderberry syrup, but by the time I got it we were traveling for Thanksgiving and I was not nearby any of my trusty homeopathic and essential oil preventative treatments. I got clobbered!

Not only that, my house is a wreck. In case you have not heard the sad news, my beloved EcoMaids closed their doors a few weeks ago. When my friend told me about it, I was all "Hey, I will try cleaning my own house! I can do it! I used to do it all the time!".
Yeah...before I had two kids, I did! 

What actually happened was: I went 4 weeks without cleaning my house. You would not believe the state of the floors. I started just kind of kicking the chunks out of the way. I know, right?! It's not that I didn't WANT to clean. I really did. Mentally. But physically, there is only so much of me. It turns out that vacuuming and mopping my floors is right below painting my fingernails on my list of priorities.

I finally gave up and hired one of the former EcoMaids. She is wonderful, and I love her. Now I have to actually decide on a good floor cleaning product -- it had been so long since anyone had mopped my floor without EcoMaids patented products that I had an old product that ended up smelling waaaay too strong for me. If a product smells that strongly, it can't be "green", right? When I actually do clean my floors between EcoMaids visits, I use a water-only steam mop, so I don't have to use products at all.

How about you? Are you able to clean your own house or am I alone in my incompetence in this area?